First, I used another skirt that fits her to measure the elastic and pinned the elastic so I'd know where to sew it together.
Then I used my sewing machine to hem the ends of the first fabric, cut into a rectangle. I just used a zig-zag stitch with very small width and movement to make it like a serged edge. I like this method rather than hemming it by folding it because I never get the hem straight.
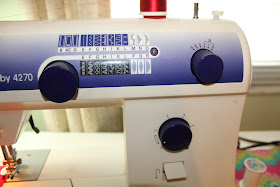
Here are my machine settings. Extremely small stitch size and an extremely small width of zig-zag.
See, now that rectangle is hemmed on one side.
I didn't take a picture, but before this, I had made another, wider rectangle from the striped fabric, and sewed a pocket for the elastic to go on. I didn't thread the elastic through until the end. Next, I sewed the hemmed fabric onto the base fabric using a regular stitch. I first sewed it right sides together, then as you can see in the picture below, I folded the fabric over and sewed along the top of the seam to keep the ruffle down.
I used this method for the next ruffle, in a different polkadot pattern for a second tier and sewed that on. Next I took the elastic and marked where the pin was, then threaded it through the casing on the striped fabric.After it is threaded all the way through, I sewed it together.
Note, this isn't the perfect way to make an elastic casing. Since I had sewed the casing all the way to the fabric edge, I had no way to sew the casing shut cleanly after I threaded the elastic, without catching the elastic, so I just didn't. The fabric was gathered way too much for anyone to notice. It was a big hit and looked quite cute. Because I used a rectangle shape, the skirt had a pencil skirt shape and stayed down rather than flying up more like an A line or circle skirt.
Happy Birthday Millie!


That skirt is the CUTEST!
ReplyDeleteYour photos are beautiful! It makes me wish I knew how to sew!
ReplyDeleteThank you so much! Honestly I didn't follow any "rules" when making this skirt, I just looked at it as making a hemmed rectangle, then folded down the top to make a hole for the elastic to go through. I didn't even finish the casing for the elastic, because it wasn't for a show or anything. I encourage you to try, even if it doesn't turn out, you'll be one step further to sewing for real :) Good luck!
ReplyDelete