Showing posts with label gifts. Show all posts
A great idea, at least to me, is a movie night.  Candy, soda, popcorn, and the best part....a Redbox code for a movie rental.
Thanks Teachers!
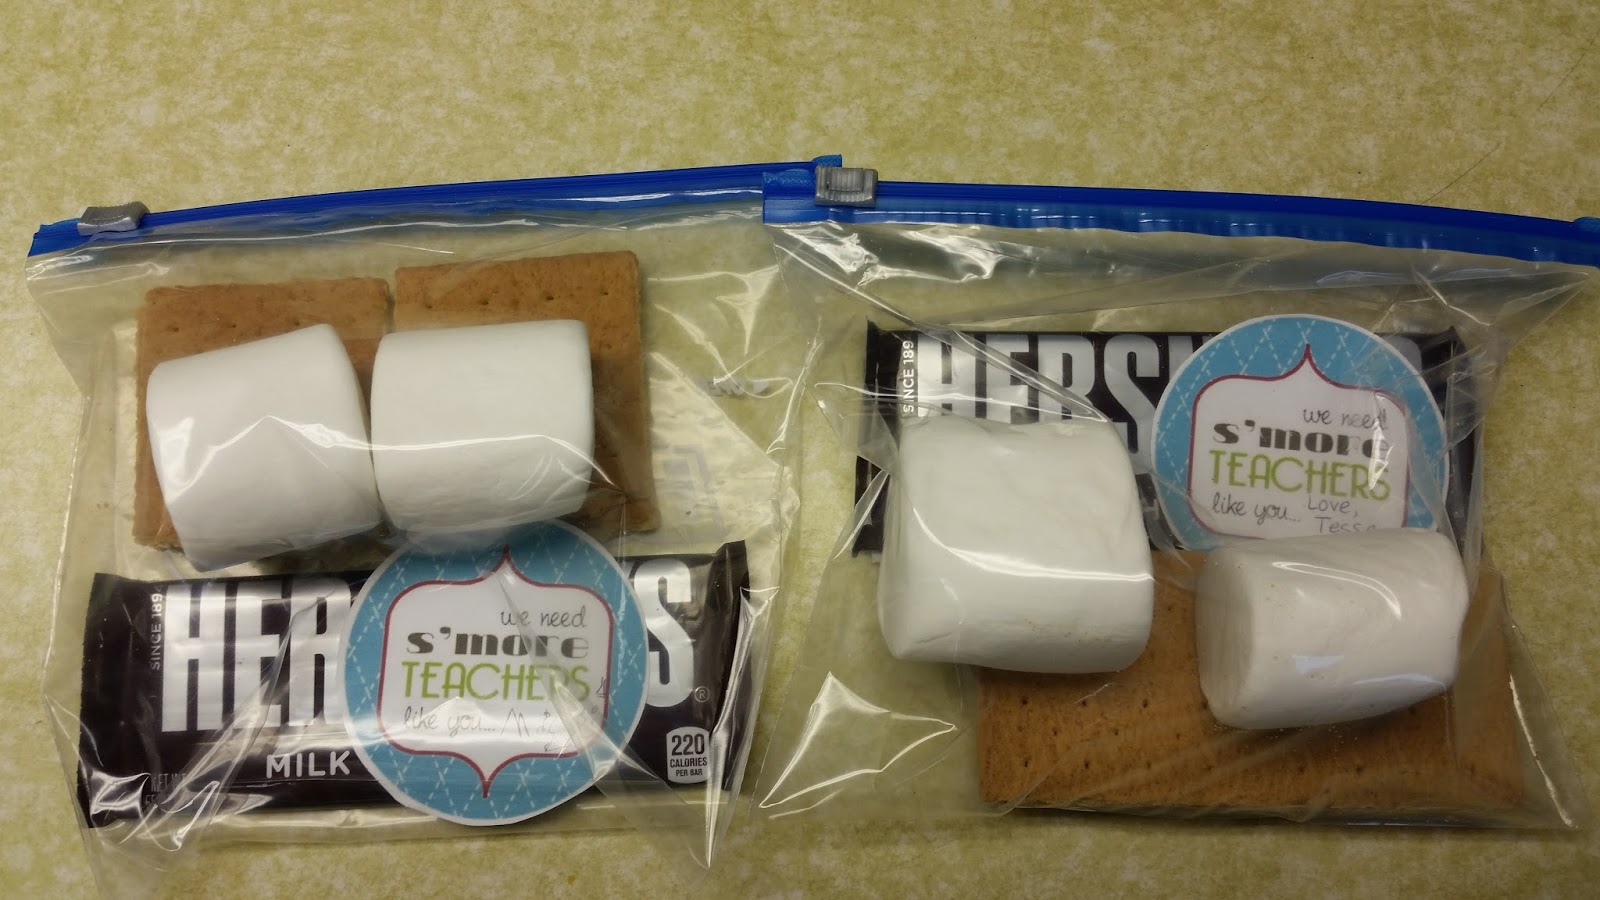
Just a quick treat for your teacher.


These came to about $3 each at our dollar store.  My favorite part is the ruler holding the sign.  Google the sign's phrase to get many options for a printable.


Big Sister Hospital Bag

Do you know someone having a baby soon?  I know about 20!  And this is for them, not for me.  No, I'm not secretly pregnant!  I whipped this up quickly, but it is sure to keep the bigger sibling busy wherever they are, be it at grandma and grandpa's or in the hospital with you, visiting their new shiny sibling.

Here is what I decided to include:
I sewed a handmade back with ribbon handles and 2 pockets on the outside.  I included a Minnie Mouse toy, a handmade cloud softie with a cool graphic print on the back (his smile looks mischievous to me), a star wand, a Crayola color markers book (the markers only make color on the included booklet), a little pouch with crayons and a stack of paper, some fun moustache stickers, and a little book with a tiny squeaker toy about opposites.

This works for a 2-3 year old, perhaps even a 4 year old would like it.  Just something special to get them excited.  I know a lot of people give it to the big sibling "from the baby", but it would be great to make it for the parent so they don't have to worry about it.

Another great idea would be a disposable digital camera so an older child could take pictures of what they wish.

Advent Workshop

I love making homemade gifts for the holidays and so I organized an Advent Workshop at our church to make some crafts and get into the holiday spirit.  We actually had 11 crafts and plenty of people attended (75 to be exact)!  Here are some of the great ideas, I got most of these from pinterest but I also had some very craft people help who came up with their own ideas.

Up first we have Christmas finger puppets.
Finger Puppets from coin wrappers
These were a huge hit for the older elementary and tween ages because it takes some time to design the little bits of character for a finger puppet.  It can be as basic as the reindeer or as complicated as Santa.  And everywhere in between.  They came out great:


A great idea for gifts for mom, aunts, or grandmas is a Bird's Nest Necklace.  I got the beads, wire, and necklace chains from Oriental Trading.  Click the links to find what to buy.
Bird's Nest Necklaces
These were also a huge hit, but for the older girls and women of the group.  Larger diameter wire makes the nest look more nesty (haha!), but it was neat to see how different each person's was. 

For younger children, a Christmas nativity is a fairly easy ornament that will travel and store very well.
Nativity Ornament
We had even preschoolers paint their sticks white, orange, blue, and brown, and used some yarn as "hay" for the little manger.

Finding gold pipe cleaner is difficult, but makes this project worth it.  I got mine at Amazon.

We also had the skiing pinecone snowman from pinterest, which was very easy for young children to make.  It didn't hold the interest of older kids because there aren't too many things to do to it, before you are done. 
Skiing Pinecone Snowman
I brought a bunch of different plaid fabrics for the kids to pick their favorite.  They also turned out really great, and show each child's personality.


One of my favorite crafts was an Ornament Wreath, which is pretty popular right now.  The great thing about it is that ANYONE at ANY AGE can make it.  BUT, you need a TON of ornaments.
Ornament Wreath
 Estimate on 60-80 ornaments per wreath.  We made about 16 wreaths with 800-900 ornaments.  AND you do have to hot glue all the little metal clips on the top of each ball so they won't fall off when you string them on the wire.  We broke a few ornaments during construction, but it was a fantastic craft and everyone really enjoyed it.  Here is an action shot:


We also had four other craft stations: Melted Crayon Ornaments, Gingerbread Houses, Fingerprint Reindeer Christmas Cards, Bell Necklaces, and Handpainted Ball Ornaments.
Fingerprint Reindeer and Bell Necklace
Fingerprint Reindeer
Painted Ball Ornaments hanging on a tree
Gingerbread House


Finally, our church's woodworking group came and gave out wooden ornaments made for the children that came to Advent Workshop.

Have you done any of these crafts?  What are your favorite homemade gifts?

Every year I put together a list of gifts from my daughter (actually this is only the second year we've had to do this, since she was born in 2011) to the rest of the family, and some gifts I make for family members from me.  I try to keep them a secret, but I also like to put on my blog what I made, so you can too.  If you are a family member, don't keep reading!!!!

If you aren't a family, just scroll down.  I'll be posting how my attempts at all these projects turn out, as I work my way through them.


Okay, so if you're still with me.

First up, I'm making framed silhouettes of my daughter.  This tutorial is really great and has a lot of help for those of you with Photoshop, which is how I plan to make mine.

Next, I'm making some embroidered tea towels of my daughter's art.  Since she is so young, I'm planning on having her do a tiny amount of scribbling in all different colors so it will be multicolored abstract (she can't draw anything that you could identify).


I'm also going to weave these knot trivets (a few for me, and a few for others).  I love their nautical feel, and they seem pretty simple.  Here's how.
 
For my daughter, I'm making a train board just like Young House Love.  I will be making a different scene for the train to go through, and I'll share when I actually make it.
These potholders are also on my list for some relatives that like homemade items.  I love the color they can have.

I am, if I have time, planning on also making this fabric dollhouse for my daughter.

For more relatives, that have a little cooler vibe, I'm going to help my daughter make this ink blot art.  It really will turn out well, just imagine all the color combinations you could use to personalize the gift.

And I'm making this fingerprint ornament for my husband.  How can you get a grown man's thumb imprint without him knowing?  Blindfolded, maybe??


Finally, a tried and true set of picture coasters.  I think they'll turn out very cute in black and white.


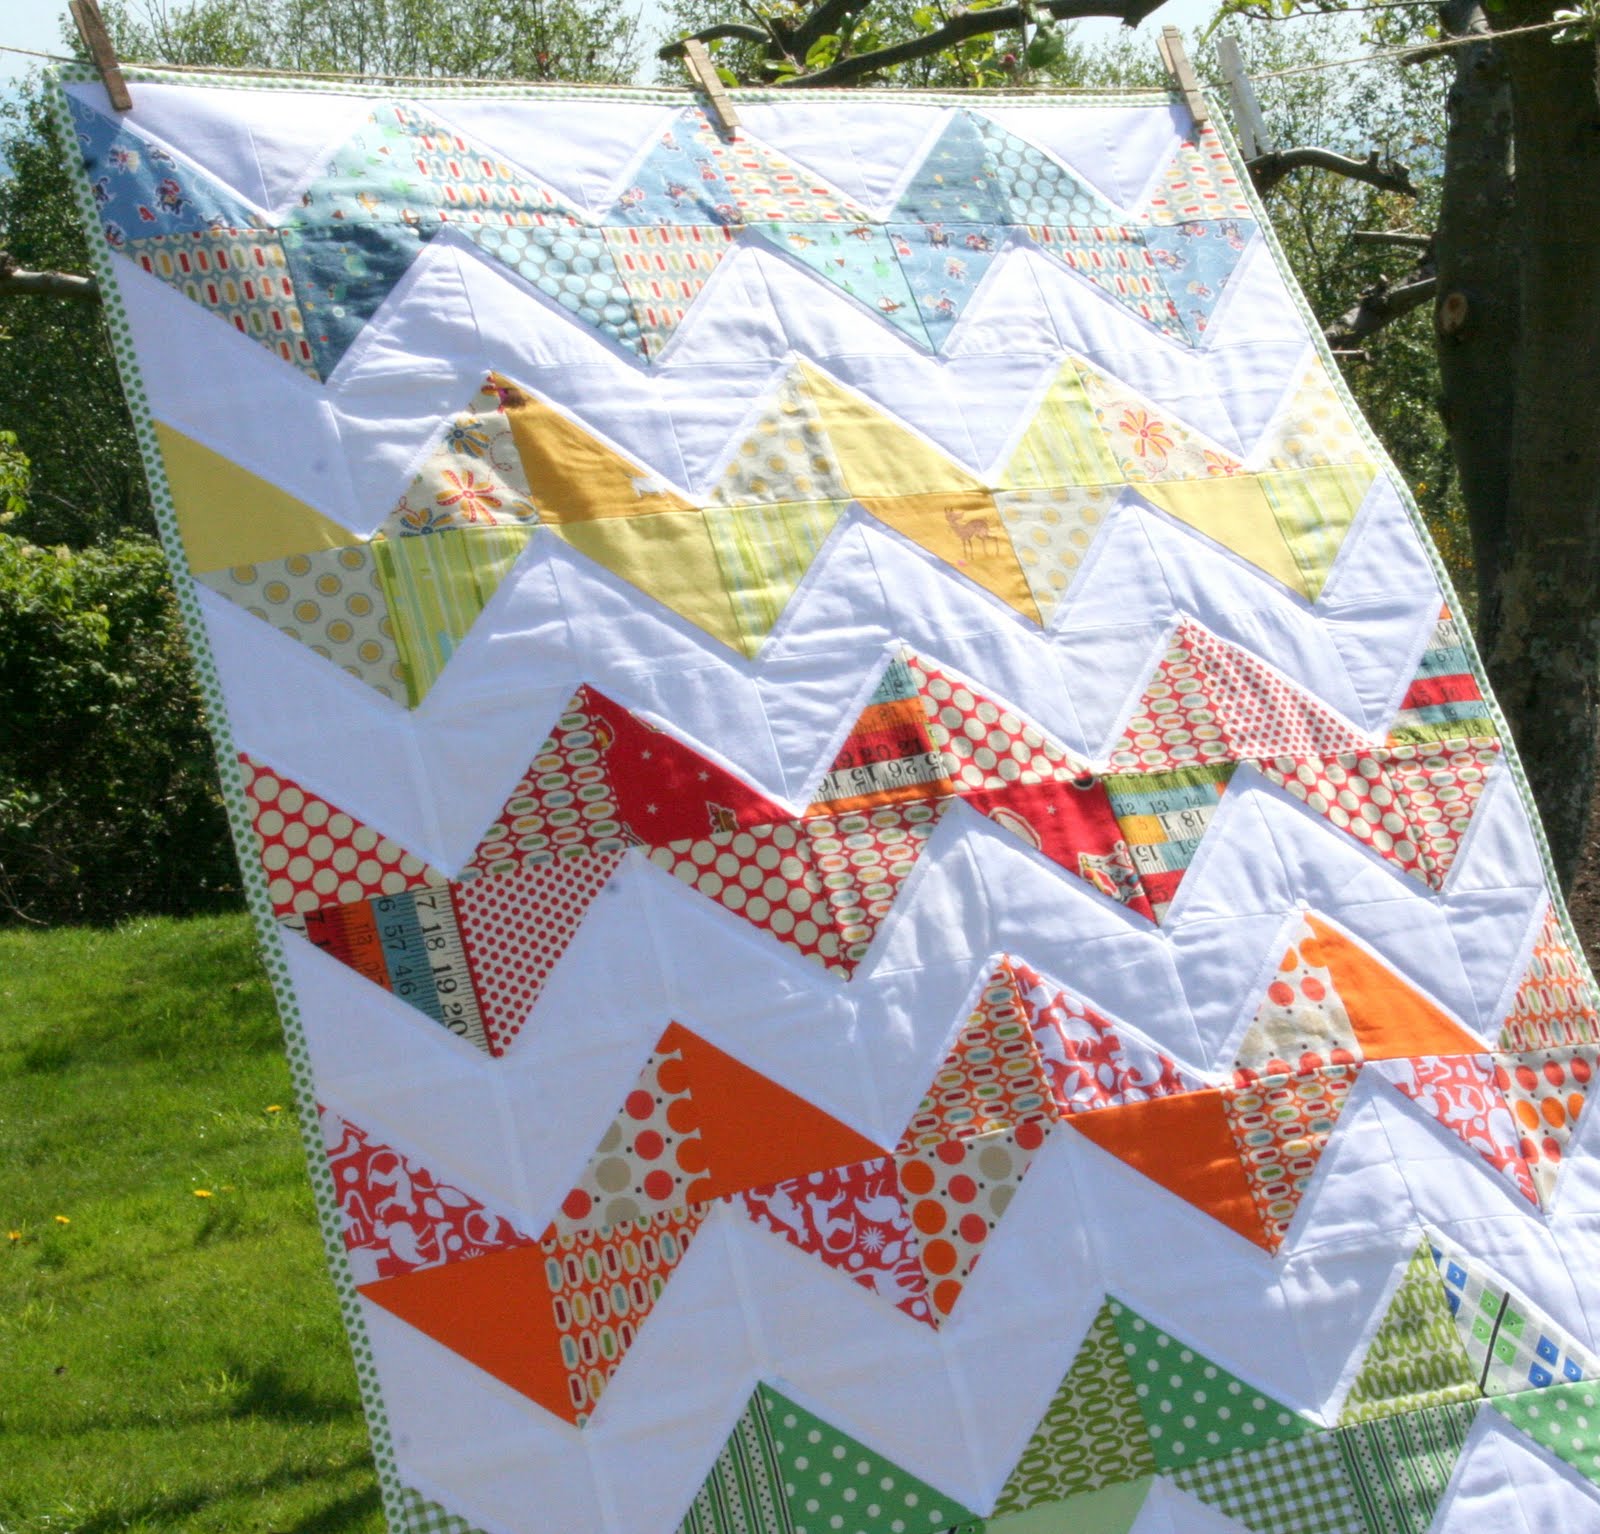
 Here's a quilt I finally finished for my friend's 3rd son, who was born just before Christmas!

Got the fabric for this quilt at the Country Living Fair in Atlanta, GA, back in October.  I loved the fair, and wish I had blogged more about this event.  I dragged my little one and my husband there, but we actually had a great time and the weather was fantastic.  It was a lot of fun seeing the top of Stone Mountain and riding the train.
At the fair's entrance, it was cold that weekend in Atlanta!

 FFA supplies.  My husband is an agriculture teacher and this was a neat find, although we didn't buy it.  If I had a house to furnish, I would have bought this for a kid's room though.
 There was a glass blower on site making their products, really neat to watch.
 A bowl of buttons.  All day I kept quiet and didn't say that I was looking for buttons.  Then I saw the pictures my husband took after we were back home.  ARGH - BUTTONS!  Never saw them so I didn't buy any.
 Cool tool box.
Top of Stone Mountain - baby fast asleep.

I am so inspired at these large fairs to see how people showcase their handmade items, their antiques, and their displays.  Everything was beautiful.  I'll definitely be going back to the next fair in 2012.  And I also want to get some of the creativity I feel when I'm at a fair like this into something concrete.  When I think about all the things I want to make, gah!  I'm overwhelmed.  I'm going to try to make some of these items in batches to perhaps sell at a local fair and see if I can get things going here with nasagreen :)

The fabric I chose was a more old-fashioned looking set of fabrics, smaller repeats and more soothing colors.  I got a bake stack, from Moda Bake shop designs, and a coordinating back for the quilt.  This was my inspiration, from pinterest (again, all my best ideas are from my biggest time drain).

One thing I focus on when making baby quilts is to make the quilt adult enough that the quilt can grow with the child and it can be a cherished possession past their childhood.  The reverse is that I don't want to make something that doesn't fit a baby either.  You should keep in mind the durability of the fabrics as well, because if the owner really LOVES the quilt, it will be dragged around by a corner of the quilt.  Corner fabric durability is also a high concern.  My littlest sister had a blankey that she kept with her (and still does) and the corners were her favorite part.  They held up pretty well, but finally gave way a few years ago.  We've done numerous emergency repairs to that blanket and it still is her favorite.

It didn't take long to make the quilt top and I just used a walking foot to machine quilt along the chevrons.  It was really simple and I got to use a little of my fabric stash for the binding fabric.  I also added a label on the back with his name.  I hope he becomes a math whiz when he grows up and really likes this quilt.

Like this post?  Then pin it!   Pin It
Another handmade gift I made was for a friend with 3 boys.  The first boy is getting a cape, which I blogged about here.

The second boy is getting wonderful little handpuppets, which I found on pinterest (shocker) here.
Mine came out very close.  I found the sheep difficult and it took a long time to cut all the pieces.  I did make 2 sets, one for her son and one for my daughter, so that added cutting time.  But I think it was worth it.  A 3 year old will LOVE these!

Old McDonald

My daughter thought these were suspicious!


PS - Her 3rd son is still gestating, due December 20th and I am making a quilt, although I haven't cut any pieces for the top yet.  Looks like that will be a rush job!

UPDATE - Of course I'm way behind posting this so her son has been born...Jude Lane, and I'll be posting his quilt just as soon as she receives it!  No gift spoilers on this here blog!!!
So I had a baby.  I thought that it would be neat to give a gift from the baby to members of our family. And so it began.

The first fun day was art. Millie loves putting her hands in her mouth, but even I didn't realize how much paint she would actually eat. She really had a great time making our first project...passport covers. It was sooo cute!


Here are the finished products...

I made 5, one of which I am going to turn into a framed 5 by 7 picture instead of laminating and putting in the cover.  I got my covers online at Amazon, 5 for about $7.99 + shipping.  And I laminating them with sealing lamination covers from Staples - 4 sheets for $14.99.  So grand total was about $20 for all 5, which means $4 a piece.

When I wrapped them, because it is a little confusing what they are, I wrote on the outside of the present, "Please take me somewhere with this!  Love, Millie"

Do you like this post?  Then pin it! Pin It
Photobucket

I have a spunky nephew with a thing for superheros. So for Christmas, I'm giving him a cape that I made. Here is a tutorial for how to make your own. It is easy, I promise so even if you've never used your sewing machine before, you can do it!!!
Pin It

One of the main things about this cape is that it is light! That was a main requirement for my nephew's because the only real reason he likes capes is because they fly behind him when he runs. If you were making something for a child that likes the woods, or Lord of the Rings, or anything like that (Lion, Witch, Wardrobe, etc), then they may like a thicker fabric so it is heftier. So for his, I made a little red cape with a superman style marker on the back with his first initial "R".
Photobucket

For the tutorial, I used a thicker fabric with sparkles and the letter "J". Sorry, I don't know what the name of the fabric is, it was in the bargain bin at Joann's for $4 per yard. The red fabric was also bargain bin. Neither are cotton. The red fabric wasn't knit, so I used a regular needle. For knits, you will need a ball point needle so you don't snag the fabric. I actually am bad and used a regular needle for the blue knit, but you are taking a risk of a snag.

To Buy:
1 yard of fabric
ball point needles if you are using a knit fabric
2 different colors of felt/separate fabric to make the superhero logo
matching thread for cape and superhero fabric colors

1. Lay out your fabric and iron out all the wrinkles.

2. To make the tie, cut a 2.5 inch strip of the cape fabric.
Photobucket
3. Fold the strip lengthwise, right sides together and iron if fabrics are slippery.

4. Sew down the folded side of the strip. We will sew down the other side of the strip when we attach the cape so that isn't necessary at this point.
Photobucket
5.  Turn the strip right side out by attaching a safety pin to one end and pushing it through the inside of the tube, little by little.
Photobucket
Photobucket
6.  Fold the ends over to hide the raw edge and sew closed.
Photobucket
Photobucket
7. Set the strip aside. Next, we will make the superman logo. Freehand a diamond and then draw in your letter. Carefully cut out the diamond shape and also the letter.
Photobucket
8. Iron on wonder under or another heat bond interfacing to your contrasting fabrics. This helps keep things in place when sewing. Then trace the logo shapes onto each contrasting fabric.
Photobucket
NOTE - You want to use the letter template upside down, so that from the RIGHT side of the fabric, the letter will be correct and not be backwards. See the J, and how I made a mistake? I caught myself before I got too far, but this is very important.
Photobucket
9. Cut the logo out of each fabric. Then you can lay them on your cape and find the right positioning. I wanted long capes, that would last a while for the child, so I made the capes long and put the logo near the bottom so it could be seen. For a bigger child, you could always put the logo near the top (shoulder blade height). If you don't like a pucker when you do this (see how the red cape looks when laying flat), then I would use an interfacing on the back of the fabric before you pin on the logo.

10. Get the rest of the cape fabric and fold in half, making a square shape. Then, fold one part of the fabric down, so you can find the center line of the cape to put the center of the diamond on.
Photobucket
Mark this line with several pins (I used 3), especially if the fabric you are working with doesn't iron well.
Photobucket
11. Pin on the logo to the cape in a location you are happy with. I used the pins to help me line it up straight.
Photobucket
12. Iron the logo on.

13. Sew the logo on (with or without interfacing) with a zig zag stitch. My machine doesn't have a lot of options, so I just turn the knob to zig zag, set the stitch pretty wide, set the stitch size pretty low, and try it out on a scrap before I go to the project piece. By the way, my machine is a Pfaff Hobby. I need to upgrade soon.
Photobucket
You'll need to switch thread colors for each contrasting fabric color you use.
I had both yellow:
Photobucket
and red:
Photobucket
13. Now you are ready to sew the cape together. Take the cape with logo and put right sides together and sew the left side, bottom, and right sides together.
Photobucket
NOTE - I pinned after laying it down to be sure it would lay flat and not skew the logo.

14. Turn the cape right side out. Next, fold in the top raw edges about 1/2 inch to an inch and pin.
Photobucket
This will help you sew it closed without leaving raw edges or having to hand stitch anything. Top stitch around all three closed sides to make for a more professional finish if desired.

15. Next, we are going to pin the cape to the strip we made before which will tie around the child's neck. First, find the middle of the strip and the middle of the cape and pin that in place. The side of the strip that we haven't top stitched is to go to the top of the cape.
Photobucket
Photobucket
NOTE - I reminded myself which pin was at the center of the cape with a double pin.

16. Working outwards, make pleats from the center and pin each pleat to the tie. I like to do one side at a time, all the way to the end, and try to make each pleat the same width/depth.
Photobucket
Photobucket
17. At the end, compare the ends of the tie and see if it is about the same leftovers for the bow.

18. Then, sew all the way down the strip on the side you haven't sewn before.This can be very thick so sew slowly.  It helps the feed dogs keep up with the needle.

19. Lastly, sew the bottom of the strip to the cape only. This is our final step.
Photobucket
Yay! We finished!

Did you make it? Do you have some cute other ideas for capes? I personally think this looks like a great one for a magician! Perhaps stars are in order!!!  If you don't want to make this, I also am selling capes for Halloween or gifts in my shop :)