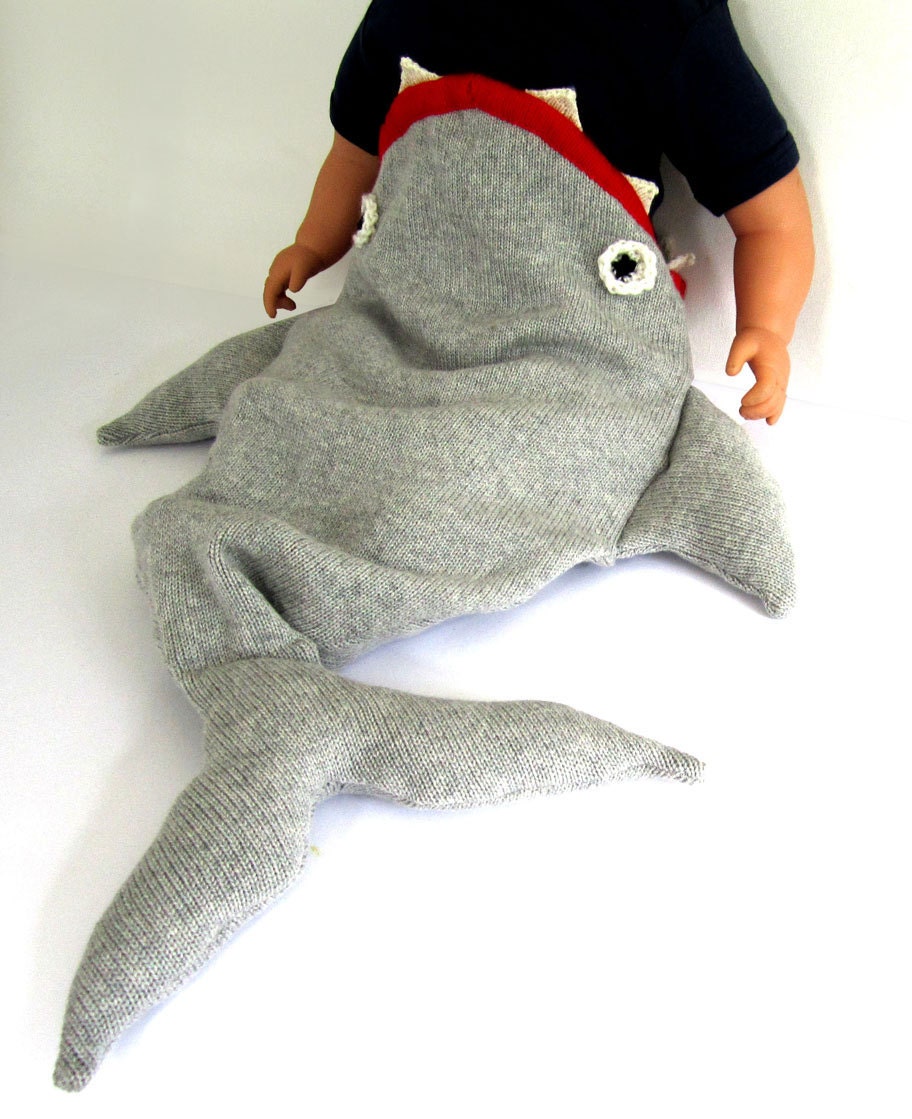
UPDATE: Welcome to those finding this post in search of a parent/baby costume that is coordinated.  I hope you try this idea because it is so easy to make.  I did use a sewing machine, but you could easily hand stitch the teeth and lips on and sew the shark together.  If you have any success or need some help, please don't hesitate to comment & I'll reply!  Happy Halloween!!

I just had to do a recreate of this pin from pinterest.

Here is what I ended up with, and I think it turned out really cute! It is a great idea for a 3-6 month baby, that can wiggle a little, isn't too upset if they "lose" their feet, and cannot crawl. Bonus is that a parent can be "in" the costume with a lifeguard to the rescue!
I have a short partial tutorial to add later, but for now, enjoy the Halloween festivities (my. favorite. holiday. ever.).
Photobucket

I have a spunky nephew with a thing for superheros. So for Christmas, I'm giving him a cape that I made. Here is a tutorial for how to make your own. It is easy, I promise so even if you've never used your sewing machine before, you can do it!!!
Pin It

One of the main things about this cape is that it is light! That was a main requirement for my nephew's because the only real reason he likes capes is because they fly behind him when he runs. If you were making something for a child that likes the woods, or Lord of the Rings, or anything like that (Lion, Witch, Wardrobe, etc), then they may like a thicker fabric so it is heftier. So for his, I made a little red cape with a superman style marker on the back with his first initial "R".
Photobucket

For the tutorial, I used a thicker fabric with sparkles and the letter "J". Sorry, I don't know what the name of the fabric is, it was in the bargain bin at Joann's for $4 per yard. The red fabric was also bargain bin. Neither are cotton. The red fabric wasn't knit, so I used a regular needle. For knits, you will need a ball point needle so you don't snag the fabric. I actually am bad and used a regular needle for the blue knit, but you are taking a risk of a snag.

To Buy:
1 yard of fabric
ball point needles if you are using a knit fabric
2 different colors of felt/separate fabric to make the superhero logo
matching thread for cape and superhero fabric colors

1. Lay out your fabric and iron out all the wrinkles.

2. To make the tie, cut a 2.5 inch strip of the cape fabric.
Photobucket
3. Fold the strip lengthwise, right sides together and iron if fabrics are slippery.

4. Sew down the folded side of the strip. We will sew down the other side of the strip when we attach the cape so that isn't necessary at this point.
Photobucket
5.  Turn the strip right side out by attaching a safety pin to one end and pushing it through the inside of the tube, little by little.
Photobucket
Photobucket
6.  Fold the ends over to hide the raw edge and sew closed.
Photobucket
Photobucket
7. Set the strip aside. Next, we will make the superman logo. Freehand a diamond and then draw in your letter. Carefully cut out the diamond shape and also the letter.
Photobucket
8. Iron on wonder under or another heat bond interfacing to your contrasting fabrics. This helps keep things in place when sewing. Then trace the logo shapes onto each contrasting fabric.
Photobucket
NOTE - You want to use the letter template upside down, so that from the RIGHT side of the fabric, the letter will be correct and not be backwards. See the J, and how I made a mistake? I caught myself before I got too far, but this is very important.
Photobucket
9. Cut the logo out of each fabric. Then you can lay them on your cape and find the right positioning. I wanted long capes, that would last a while for the child, so I made the capes long and put the logo near the bottom so it could be seen. For a bigger child, you could always put the logo near the top (shoulder blade height). If you don't like a pucker when you do this (see how the red cape looks when laying flat), then I would use an interfacing on the back of the fabric before you pin on the logo.

10. Get the rest of the cape fabric and fold in half, making a square shape. Then, fold one part of the fabric down, so you can find the center line of the cape to put the center of the diamond on.
Photobucket
Mark this line with several pins (I used 3), especially if the fabric you are working with doesn't iron well.
Photobucket
11. Pin on the logo to the cape in a location you are happy with. I used the pins to help me line it up straight.
Photobucket
12. Iron the logo on.

13. Sew the logo on (with or without interfacing) with a zig zag stitch. My machine doesn't have a lot of options, so I just turn the knob to zig zag, set the stitch pretty wide, set the stitch size pretty low, and try it out on a scrap before I go to the project piece. By the way, my machine is a Pfaff Hobby. I need to upgrade soon.
Photobucket
You'll need to switch thread colors for each contrasting fabric color you use.
I had both yellow:
Photobucket
and red:
Photobucket
13. Now you are ready to sew the cape together. Take the cape with logo and put right sides together and sew the left side, bottom, and right sides together.
Photobucket
NOTE - I pinned after laying it down to be sure it would lay flat and not skew the logo.

14. Turn the cape right side out. Next, fold in the top raw edges about 1/2 inch to an inch and pin.
Photobucket
This will help you sew it closed without leaving raw edges or having to hand stitch anything. Top stitch around all three closed sides to make for a more professional finish if desired.

15. Next, we are going to pin the cape to the strip we made before which will tie around the child's neck. First, find the middle of the strip and the middle of the cape and pin that in place. The side of the strip that we haven't top stitched is to go to the top of the cape.
Photobucket
Photobucket
NOTE - I reminded myself which pin was at the center of the cape with a double pin.

16. Working outwards, make pleats from the center and pin each pleat to the tie. I like to do one side at a time, all the way to the end, and try to make each pleat the same width/depth.
Photobucket
Photobucket
17. At the end, compare the ends of the tie and see if it is about the same leftovers for the bow.

18. Then, sew all the way down the strip on the side you haven't sewn before.This can be very thick so sew slowly.  It helps the feed dogs keep up with the needle.

19. Lastly, sew the bottom of the strip to the cape only. This is our final step.
Photobucket
Yay! We finished!

Did you make it? Do you have some cute other ideas for capes? I personally think this looks like a great one for a magician! Perhaps stars are in order!!!  If you don't want to make this, I also am selling capes for Halloween or gifts in my shop :)
Our daughter is having her baptism at the end of October, so I've been busy (as a bee) dreaming up a fun little party that doesn't cost too much.

One of the first things I thought of after deciding to do a "bee" theme is that making your own invitations isn't really that difficult. So I thought it would be great to have a beehive as an invitation.

First, it came out much better than I thought. I am by no means an artist. Another question I bet you are thinking is: how do I get envelopes for my cards? Well, I bought mine with envelopes.com. They are great and for 50 envelopes, it was only $9.99 plus shipping. So far so good! Those came in the mail and I was off to the races.

I decided to keep the costs down, I would make 2 invitations per page of paper, which basically means a 5 x 7 invitation. That would mean an A7 envelope. I found this out by using the google and asking "What envelope size do I use for a 5 x 7 invitation?". It told me the answer. Smart google.

Next, I went to my local Joann's and picked up some letter sized scrapbook paper. I wanted the thick kind and my choices were limited to 2 yellow papers. One had gold in it (yuck!) and the other had a canvas feel. I personally thought the canvas feel had a more "hivey" look, so I went with that one.

I needed 14 invitations so I bought 9 pieces of the paper just in case I made printing mistakes.

Next, when I got home, I had to measure the paper and cut it down to 8.5 x 11 inches because that is what I was using as a paper size in the word template. Here is the word template by the way. You can edit it however you would like. I just love the bees I got from clipart!

Then, I drew out the hive shape I wanted the invitation to have. This was a bit trickier because it had to be in the 5 x 7 size for the envelopes and also contain all the words. I cut down a plain sheet of paper to 5 x 7.
Next, I printed out the words on my fancy paper. Be sure to do a couple tests if you change the wording template to be sure it will fit in the hive. Once I was sure, I printed out 9 copies (enough for 18 invitations). Then I traced the hive onto each invitation. I folded the hive across in a straight line as a guide to be sure the hive wasn't crooked, and aligned the fold with the last line on the invitation about the RSVP. It worked like a charm.

Then I cut out the invitations and decorated. I loved adding the dotted lines from the bee stinger to show a little movement. I think this was the best part of making the invitations. What do you think? Does it look like a beehive?

Be sure to stay tuned, more party DIY to come!
I was recently asked what I want to do for my birthday and thought -- bowling?? a movie?? Blah! There wasn't anything I need or wanted to do, and then I saw this post:

http://mixmingleglow.com/blog/?p=1358

This girl is awesome! She turned 38 and did 38 random acts of kindness (RAOK) throughout the day. I am going to do this (although I'm going to do it on the Saturday before my birthday).

Do you have any ideas of what I can do that are cheap but would mean something to people? I want to touch people but can't give 45 coffees out or something like that.

1. Collect trash
2. Help push carts back from a parking lot
3. Leave a note of encouragement in a self-help book at the library
4. Write thank you notes around town
5. Fill parking meters downtown (do we have those in my hometown? I have no idea!)
6. Pay for someone's meal inside a fast food restaurant
7. Pay for a toll for someone behind me
8. Write a letter to an old friend
9. Hand bottles of water out to someone on a jog
10. Go to the playground and leave some change for kids to find (carefully)
11. Tape change to a few vending machines in the hospital
12. Read a story to kids in Barnes and Noble
13. Cut a neighbor's lawn (and mow my own of course!)
14. Leave a thank you note with a treat to our mailwoman
15. ??

I need 16 more ideas! So any you can think of would be great :)

Millie's First Rice Cereal


We tried Rice cereal with Millie last night at dinner time. She did really great and it is a fun part of having a baby!
Pin It

Remember the I See Me! books? Well, in addition to using the 20% OFF coupon code INCREDIBLE until August 31, 2011, you can also get free Personalized stickers!
They have books for introducing a baby's name, pirate adventures for boys, or fairy tales for girls.

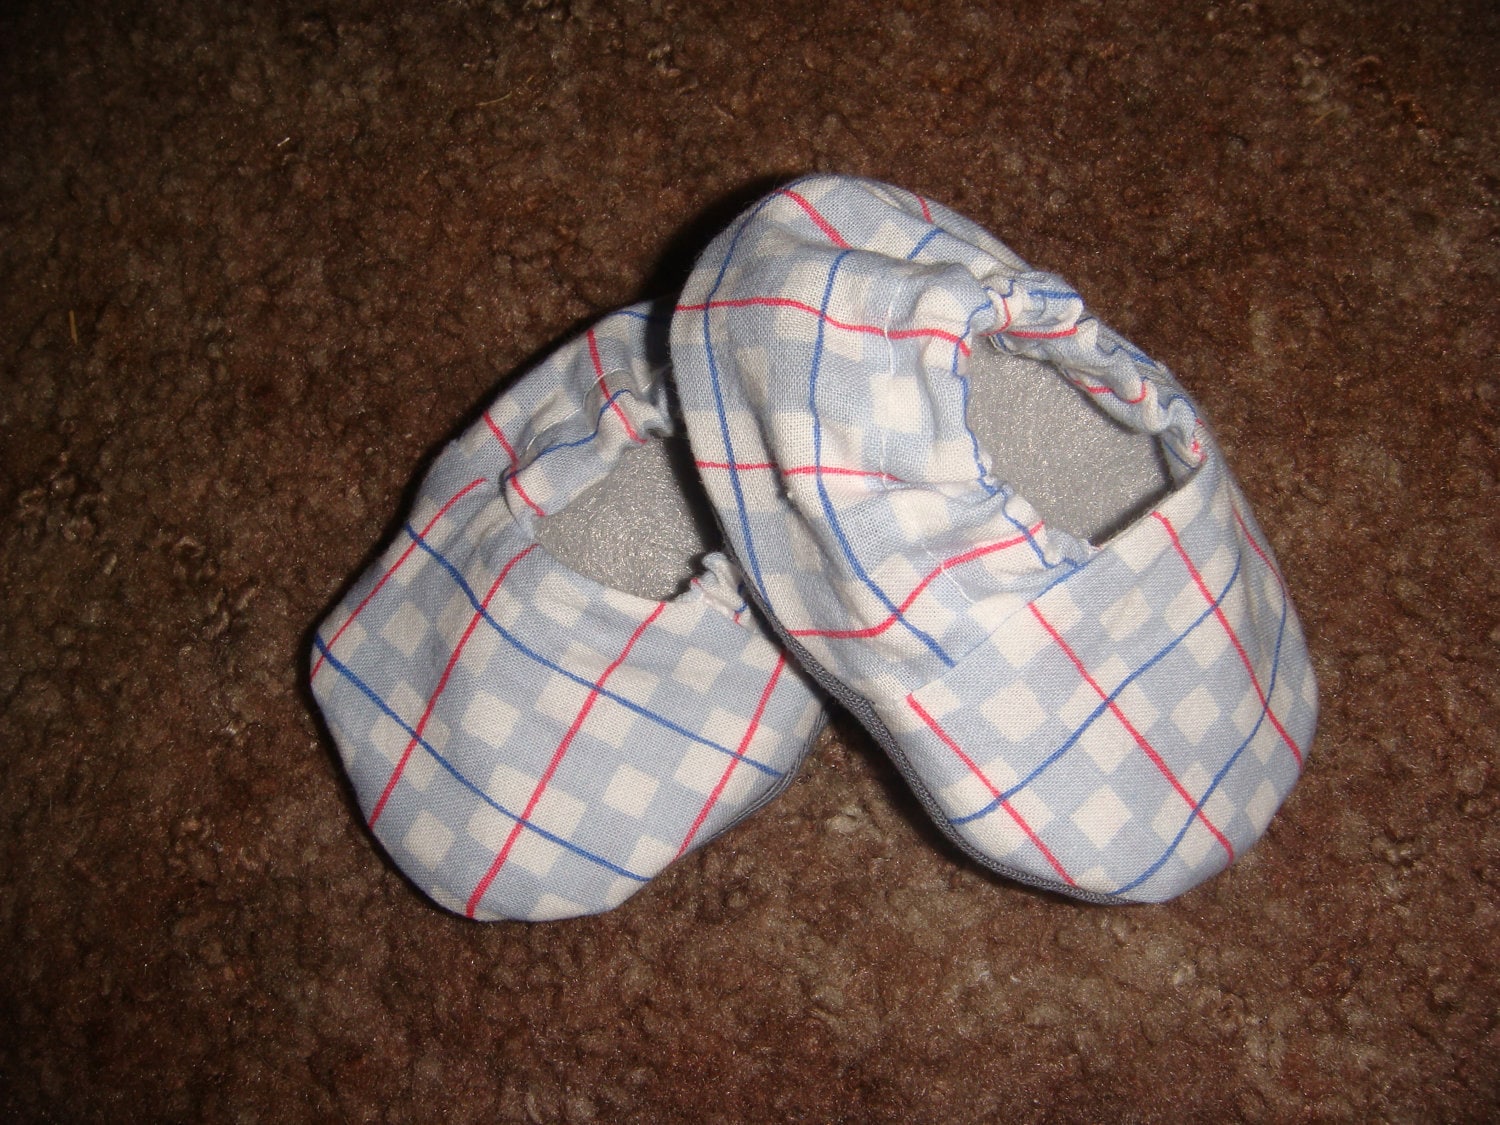
Boy's Shoes - Gray Plaid

I love this fabric for a pair of little boy's shoes. These are 3-6 months.

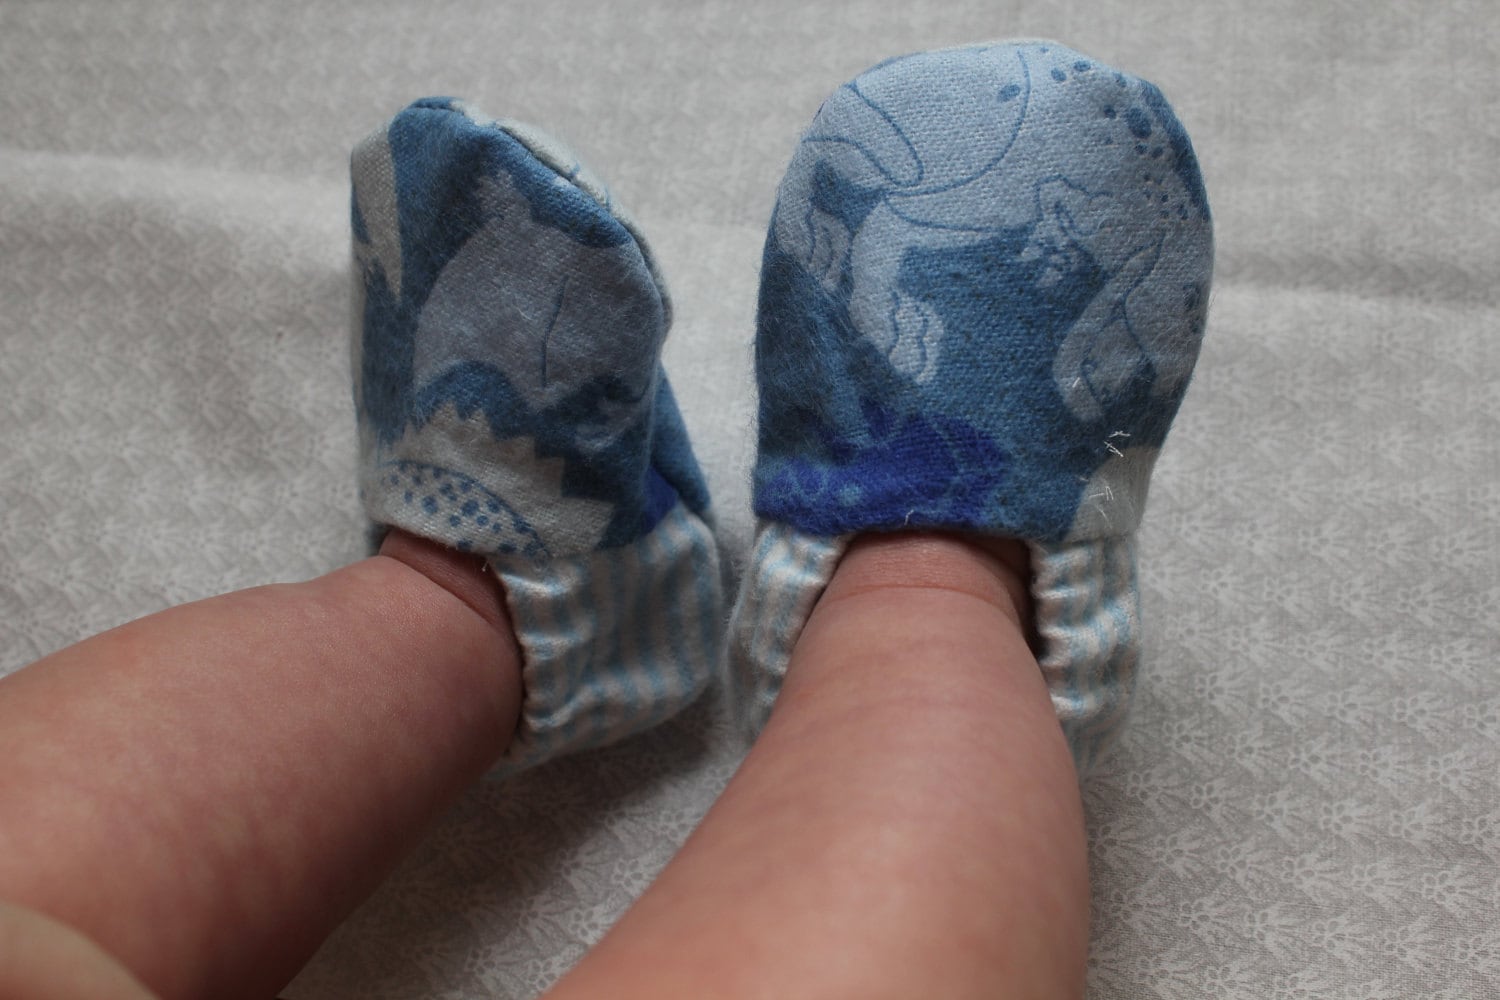
These actually also have a felt liner so there are no rough edges inside. I also have the same type of style with dinosaur fabric.
Have you ever seen the Tatertots and Jello blog? I love love love this blog and check frequently for crafting ideas, from quilting to homemade gifts. She is very creative and has unique ideas (puff quilts anyone?).


So many different ways to use these, but I would love to use them in my etsy shop packaging if I won the giveaway! What would you use them for?


She is currently having a giveaway for Twisted Sugar Twine, which is sooo cute!

I See Me! Books

Have you ever seen the I See Me! books? They are customizable. I first heard about them when my dear friend, J, bought my daughter a book....in it, colorful, beautiful animals spell both her first and last name in rhyme. It is so imaginative and fun!

Pin It

They have other options instead of introducing a baby's name, like pirate adventures for boys or or fairy tales for girls.

Here is a picture of the letter pages for the My Very Own Name book we have:


Well, until August 31, 2011, you can get 20% off these books with the code INCREDIBLE! If you saw the Eversave coupon a while back, I think you could combine with that gift certificate for an even lower price.
Ok, I just made this outfit for a baby gift size 0-3 months....what do you think?

Pin It
I rather like the polka dots! And it is more grown up than the normal nursery material with animals. It was simple: drew a pattern of the tie, ironed on wonder under (heat bond actually), ironed on the tie to the onesie, sewed the seams with a zig-zag stitch (in Navy blue thread to match), and then washed to be sure it would stay together. I'm so pleased it came out so well!

These are on etsy -- PM me if you like the set but want a custom order.

New Post, New Blog -- Almost

Wow, it has been almost a year since I last posted.

In that time, a lot has happened. I got pregnant, we moved (without selling the old house), we have a buyer for the house, we tried one type of short sale, we got denied, we are in the process of another type of short sale, I started a new job, we had the baby (a girl - M), and I started an etsy business.

Which leads me to my new point of view for blogland - - CRAFTING! I love it, and so should you. Even if you aren't all that creative, you should try crafting just for the heck of it. And in that line, I would like to share my new creations from etsy. Keep in mind, most of what I create, I create because I love the process. I love the feel of fabric, the clack of the sewing machine, the little fuzz that scissors get on them when cutting thick fabrics.....even though that means more cleaning. So stick with me, invite your friends, find some cool stuff to send to me. We can have fun!
Remember this monstrosity? Well, it is no more! What did I do for four straight days last weekend? Well of course, work in the steamy Florida heat and finally lay down the paver walkway and landscaped the side of our house. Let me remind you of what this all looked like last February (I bought the pavers last summer planning on a winter project...but winter turned to Labor Day).
We had already removed all the boards and the sheds, as explained in three previous posts, go there to review how much work had already taken place - Part 1, Part 2, and Part 3. You can tell just how steamy it was in the picture above. That's my dad and sister helping to dig out the place we would need to level before we put in the pavers.
And more digging. This shows the strips of plywood we put down with stakes to mark the edges of the path and to give us a level height to work from. We leveled the plywood tops with a string and level that we marked off from the height of the pool deck so the pavers wouldn't be very far away from that. It was hard to be perfect. You can see in the above picture that we were working on leveling the dirt before we starting adding leveling sand to perfect the surface to lay the pavers on top of.
Here you can see we put down leveling sand on top of the dirt we had leveled the same way. This involved using the board my dad is holding and scraping it along the top of the plywood (shown in the right of the photo). It is called a screed. So that helped us make the dirt level and also the leveling sand level.
The path almost done with sand; nice and level.
Whole path done. Now to lift all the pavers and put them in place on the path. I picked some pavers that would create a natural looking path, not square and it was neat how they fit together like a puzzle.
This is what the path will look like....next we used polymeric sand to fill in the gaps. Polymeric sand does not promote weed growth, doesn't float away like regular sand/dirt, and also will harden somewhat. Follow the directions on the package...and one bucket of that stuff goes a long way.
Here you can see I next put down landscaping edging along the sides of the path, filled in the pathway with regular dirt to keep the pavers locked in place, and mulched and planted the sides of the path with Florida native species. I'm hoping these won't die like the last 3 sets of plants I tried.
Ta da! Just a reminder of what this looked like before! What a difference!


I hope you enjoyed this....I'm so glad it is done. And just in time to put our house up for sale because I got a new job in Tampa. Whew! And we have an open house this Saturday (tomorrow) that hopefully goes well :)