So I had a baby. I thought that it would be neat to give a gift from the baby to members of our family. And so it began.
The first fun day was art. Millie loves putting her hands in her mouth, but even I didn't realize how much paint she would actually eat. She really had a great time making our first project...passport covers. It was sooo cute!
Here are the finished products...
I made 5, one of which I am going to turn into a framed 5 by 7 picture instead of laminating and putting in the cover. I got my covers online at Amazon, 5 for about $7.99 + shipping. And I laminating them with sealing lamination covers from Staples - 4 sheets for $14.99. So grand total was about $20 for all 5, which means $4 a piece.
When I wrapped them, because it is a little confusing what they are, I wrote on the outside of the present, "Please take me somewhere with this! Love, Millie"
Do you like this post? Then pin it! Pin It
Pages
▼
Wednesday, December 14, 2011
Saturday, December 3, 2011
Travel Cake Pops
I threw a mini shower for a guy at work who was getting married. I secretly found out that his reception was themed on their travels together before getting married and thought that I could present him with a gift card from everyone at work and make some globe cake pops for everyone to enjoy.
I decided to handmake the gift card holder, which is a passport replica. I made the top from royal blue felt and the inside has a light blue fabric with a pocket for the gift card. I also hand embroidered the passport emblem for the USA on the front cover, freehand. I couldn't get any of my fabric markers to show up, so I just eyeballed it.
Then, I made the cakepop stands, which are small blocks of dry floral foam, with 10 places for the cake pops. I covered the foam with tin foil, then wrapped the outside with scrapbook paper, and stuck that on with double stick tape. Then I used M&Ms to cover the aluminum foil after the cake pops were in place. Note, don't put the holes for the sticks too close together, they didn't fit and stuck together when I tried to use every hole. I used bakerella's generic cake pop mix, find her here (she is Amazing!).
I decorated each pop individually to look like a globe. I used blue candy melts for the water, and then used a premade green icing color to make the land masses. I think they were pretty good, what do you think?
Like this? Then pin it! Pin It
Tuesday, November 29, 2011
Robbie the Robot
Saturday, November 26, 2011
Bumblebee Baptism Party - 4 - Beehive Cake
I saw another inspiration photo on pinterest:
I thought that would be perfect for Millie's baptism, so I called up It's A Piece of Cake by Maggi, my favorite cake store, and emailed them a picture. She is amazing. See?
I did 3 different projects with this cake. The first was the chalkboard signs that had really corny sayings like:
- To Bee or Not to Bee
- Beelieve
- I Beelieve I Can Fly
They were simple and I followed the tutorial here.
I also made a popular banner with sticks and flags that have Millie's name across. This was very easy, I just cut out scrapbook paper into triangles, put one letter on each flag, hot glued the paper to string, and then wrapped the string around the sticks. The sticks were dowels from Jo Anne fabrics that are very narrow in diameter, the narrowest they had (1/4 inch I think).
I also made the bees that were "flying" around the cake. They were just small black and yellow pom poms glued together, with a yellow stripe painted on the black pom pom with acrylic paint, two puffy paint eyes on the yellow pom pom, and then some tulle wings cut into shape hot glued on their backs. I hung them at different heights from two different sized embroidery hoops that I had in my sewing collection.
Here are the rest of the party linkups:
Part 1: Invitations
Part 2: Headbands
Part 3: Yellow Flag Banner
Like this post? Then pin it! Pin It
Tuesday, November 22, 2011
Bumblebee Baptism Party - 3 - Yellow Flag Banner
 |
| Inspiration photo |
First, select your fabrics. A great part of this project is showcasing all the fabric you may (of course we have too much fabric!) have collected and using some of the pieces to justify to your loved ones just why you have to have more fabric :)
Since ours was a fall bee theme, I tried to stick with harvest colors. I happen to have a ton of plaid and stripes from a crazy plaid and striped only quilt that was a mess, so I did get to use a few of those fabrics.
Next, cut 6.5" wide strips of each fabric so that you can cut your triangles. I use trirecs tools to cut triangles because I have them and they were the right type of triangle for me (these are icoscoles if you wanted to know). I used to teach high school mathematics.
Cut as many sets of triangles as you would like. Each set will make one flag. For some flags, one side of the flag was in one fabric, and the other side was different. It depends on your taste.
Next, I cut a 2.5" strip for bias fabric (to make the banner). This was a fabric I got at Walmart last Christmas to make a wonderful casserole carrier from Homemade by Jill. Anyways, cut those and sew the ends together. You will have to fold and iron to hide the raw edges, just like making bias tape for quilts. Here is a fabulous tutorial if you don't know what I mean.
This is the Bias fabric name. I love these names. I sewed the strip together and folded with the iron.
Then I sewed together the pairs of flags, wrong sides together.
Then I turned each of the flags right side out carefully using a plastic tool.
I decided to keep a 6 inch gap between the flags to make it longer, so it would be a long banner rather than a short one. So you just pin each flag in between the bias sandwich, so that no raw edges are showing, and then there is only one more step.
You sew straight down the binding to finish the banner.
And you're done!
Here is how we used them in my daughter's six month pictures and at the party.
Like this post? Then pin it!
Pin It
Want to see more of the bumblebee party? Part 1- Invitations or Part 2-Headbands. Take your pick :)
Saturday, November 5, 2011
Bumblebee Baptism Party - 2 - Headbands
I already put up one blog post about the invitations for the baptism party here, but I wanted to keep on giving details for most of my projects. I had the idea of each guest getting a headband to wear, but scaled it back to keep people from feeling like they HAD to wear a headband. To get people in the bee mood at the party, I offered headbands outside the front door on a small table. We also hung some of Martha's tissue pom poms, which were a cute yellow color (sorry, my sister took them for her apartment so I don't have pictures). Go here for inspiration.
The flower headbands are very simple to make. I got stretchy elastic headbands at the dollar store, and hot glued flowers to a piece of felt. Then I cut the felt to a minimum outline, and hot glued it to another piece of felt to glue it to the headband. I put the metal part of the headband inside the felt, to hide it, and they pretty much fit everyone, even my 6 month old daughter.
Some people were even sad we ran out of headbands!!
Like this post? Pin it!Pin It
Here is what they looked like on. I made the antenna style for a literal interpretation of the Buzzing Bee, but I also made some of those popular flower headbands, mainly worn by the females at the party.
The flower headbands are very simple to make. I got stretchy elastic headbands at the dollar store, and hot glued flowers to a piece of felt. Then I cut the felt to a minimum outline, and hot glued it to another piece of felt to glue it to the headband. I put the metal part of the headband inside the felt, to hide it, and they pretty much fit everyone, even my 6 month old daughter.
Some people were even sad we ran out of headbands!!
Like this post? Pin it!Pin It
Saturday, October 29, 2011
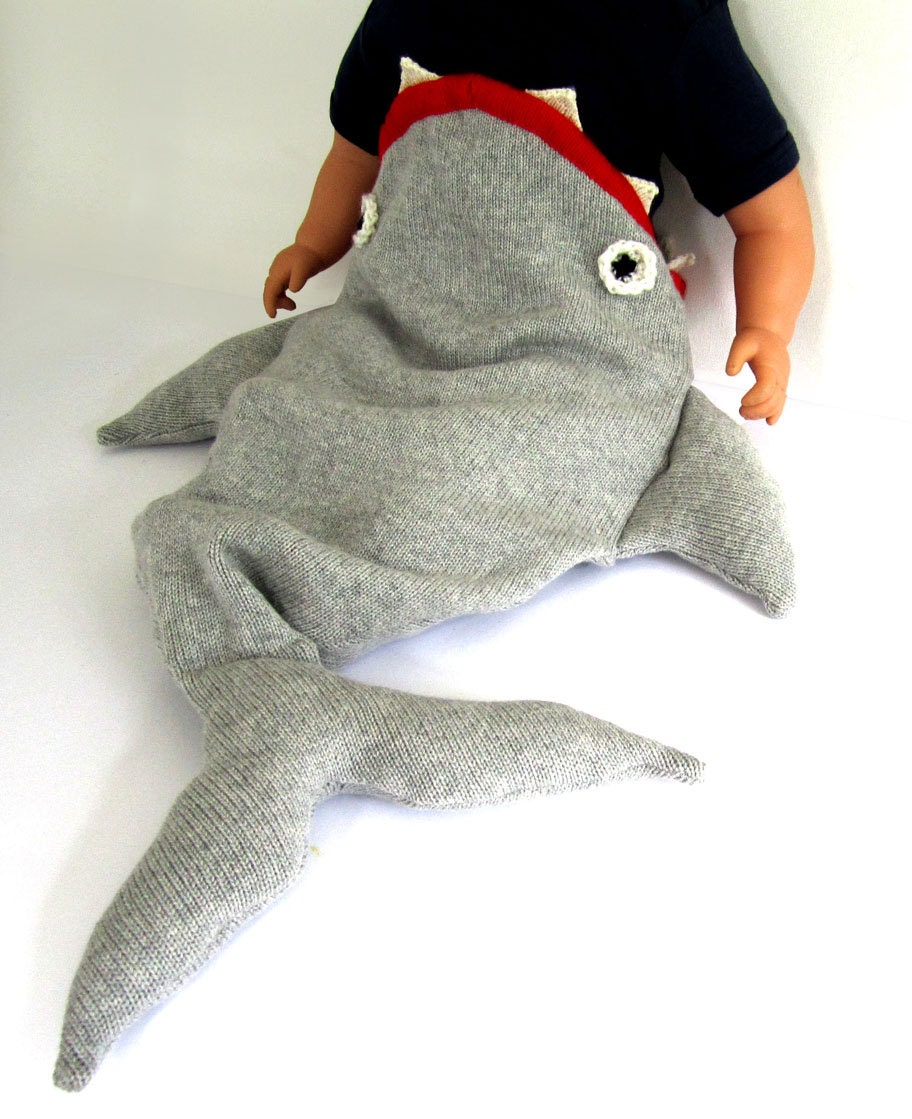
Shark Attack Victim & Lifeguard Halloween Costumes
UPDATE: Welcome to those finding this post in search of a parent/baby costume that is coordinated. I hope you try this idea because it is so easy to make. I did use a sewing machine, but you could easily hand stitch the teeth and lips on and sew the shark together. If you have any success or need some help, please don't hesitate to comment & I'll reply! Happy Halloween!!
I just had to do a recreate of this pin from pinterest.
Here is what I ended up with, and I think it turned out really cute! It is a great idea for a 3-6 month baby, that can wiggle a little, isn't too upset if they "lose" their feet, and cannot crawl. Bonus is that a parent can be "in" the costume with a lifeguard to the rescue!
I have a short partial tutorial to add later, but for now, enjoy the Halloween festivities (my. favorite. holiday. ever.).
Sunday, October 9, 2011
Cape Tutorial - Gift or Costume!
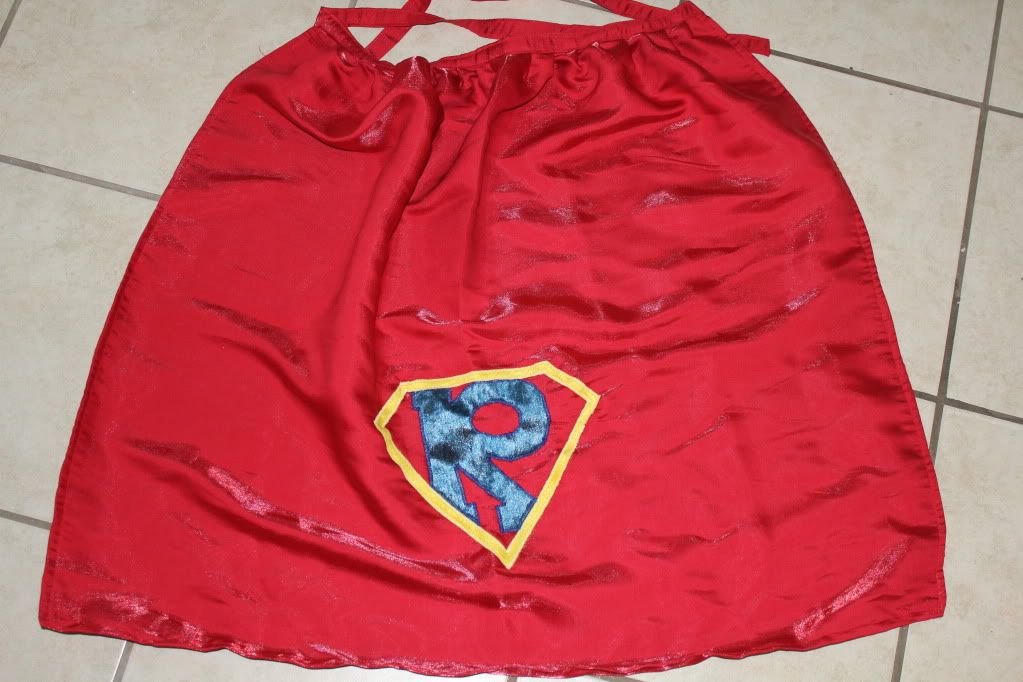
I have a spunky nephew with a thing for superheros. So for Christmas, I'm giving him a cape that I made. Here is a tutorial for how to make your own. It is easy, I promise so even if you've never used your sewing machine before, you can do it!!!
Pin It
One of the main things about this cape is that it is light! That was a main requirement for my nephew's because the only real reason he likes capes is because they fly behind him when he runs. If you were making something for a child that likes the woods, or Lord of the Rings, or anything like that (Lion, Witch, Wardrobe, etc), then they may like a thicker fabric so it is heftier. So for his, I made a little red cape with a superman style marker on the back with his first initial "R".
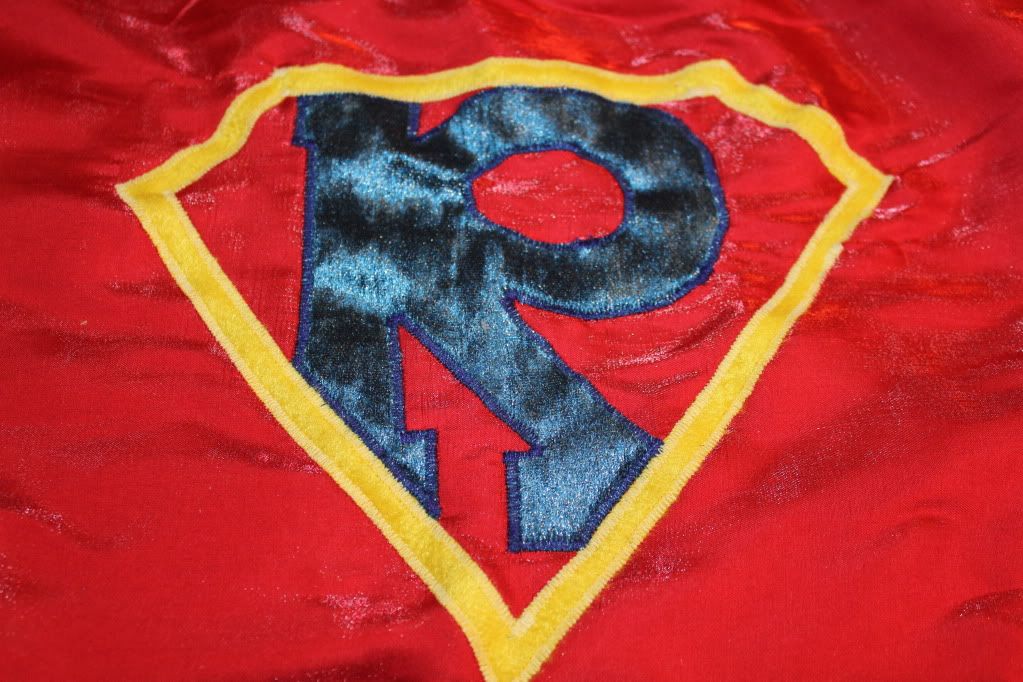
For the tutorial, I used a thicker fabric with sparkles and the letter "J". Sorry, I don't know what the name of the fabric is, it was in the bargain bin at Joann's for $4 per yard. The red fabric was also bargain bin. Neither are cotton. The red fabric wasn't knit, so I used a regular needle. For knits, you will need a ball point needle so you don't snag the fabric. I actually am bad and used a regular needle for the blue knit, but you are taking a risk of a snag.
To Buy:
1 yard of fabric
ball point needles if you are using a knit fabric
2 different colors of felt/separate fabric to make the superhero logo
matching thread for cape and superhero fabric colors
1. Lay out your fabric and iron out all the wrinkles.
2. To make the tie, cut a 2.5 inch strip of the cape fabric.

3. Fold the strip lengthwise, right sides together and iron if fabrics are slippery.
4. Sew down the folded side of the strip. We will sew down the other side of the strip when we attach the cape so that isn't necessary at this point.
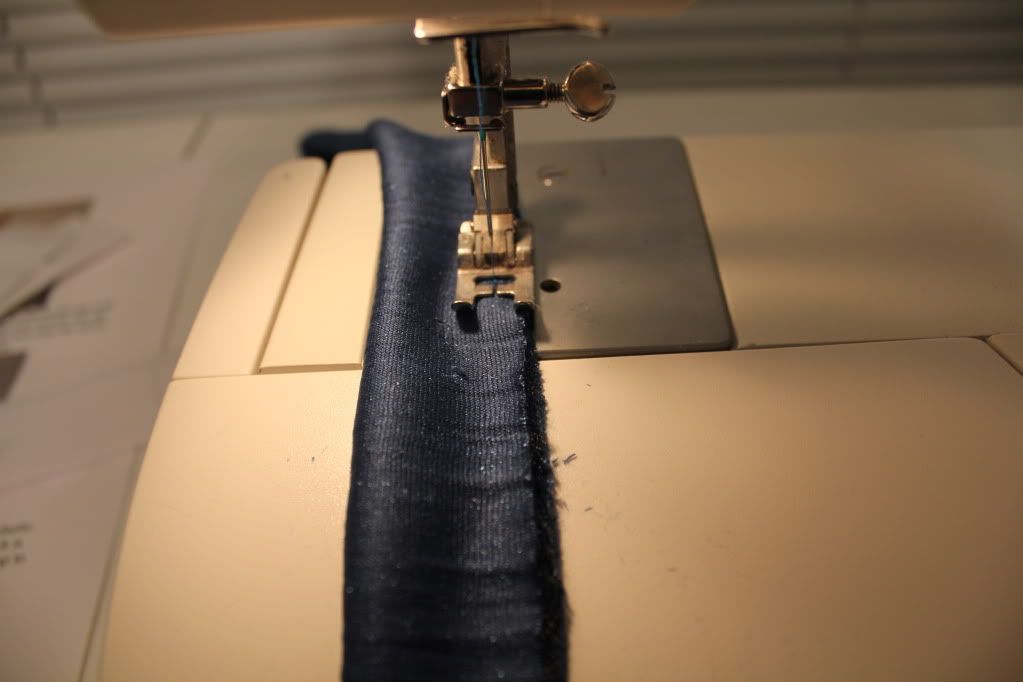
5. Turn the strip right side out by attaching a safety pin to one end and pushing it through the inside of the tube, little by little.
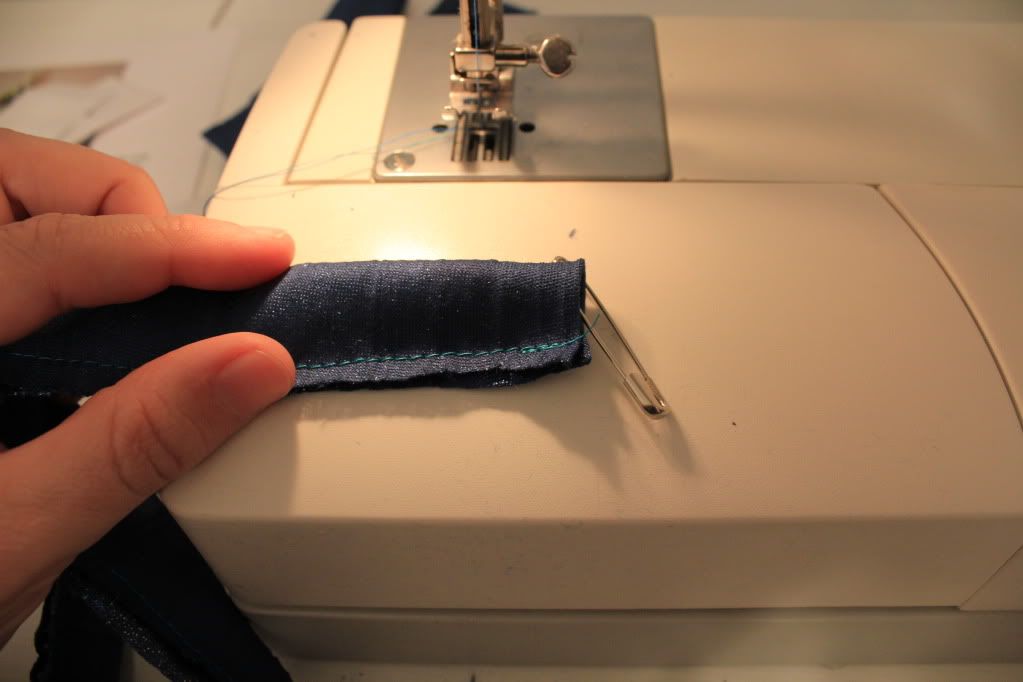
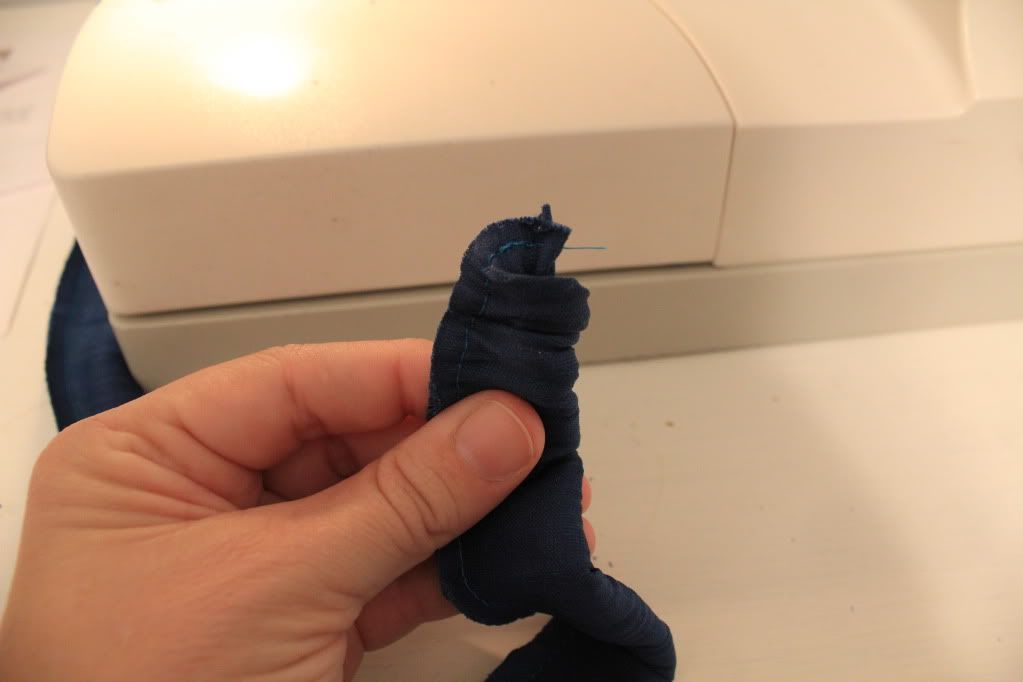
6. Fold the ends over to hide the raw edge and sew closed.
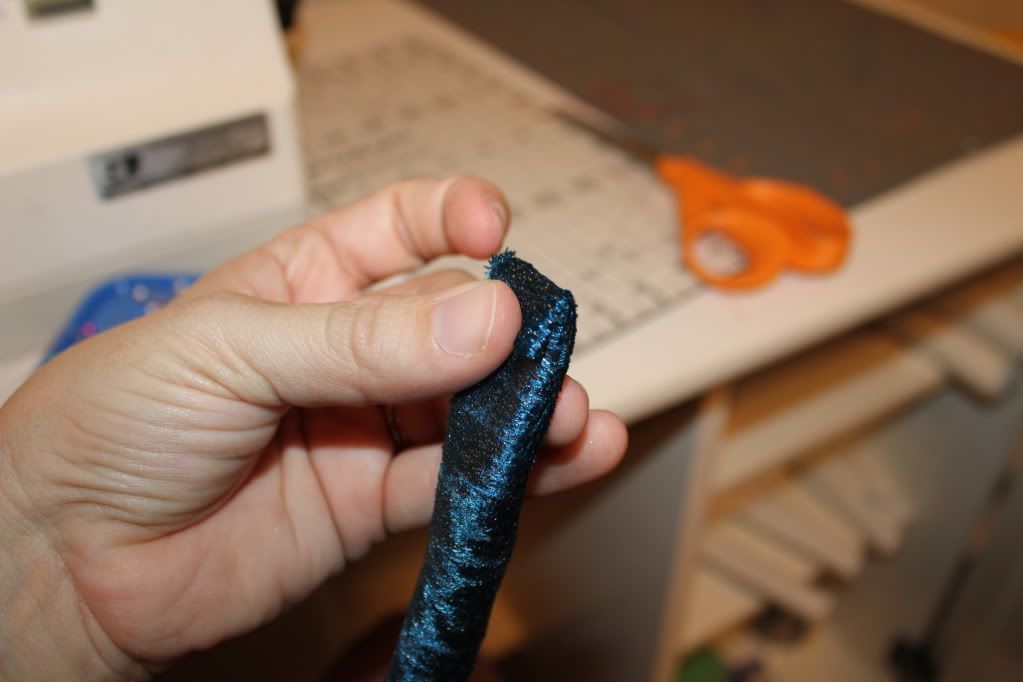
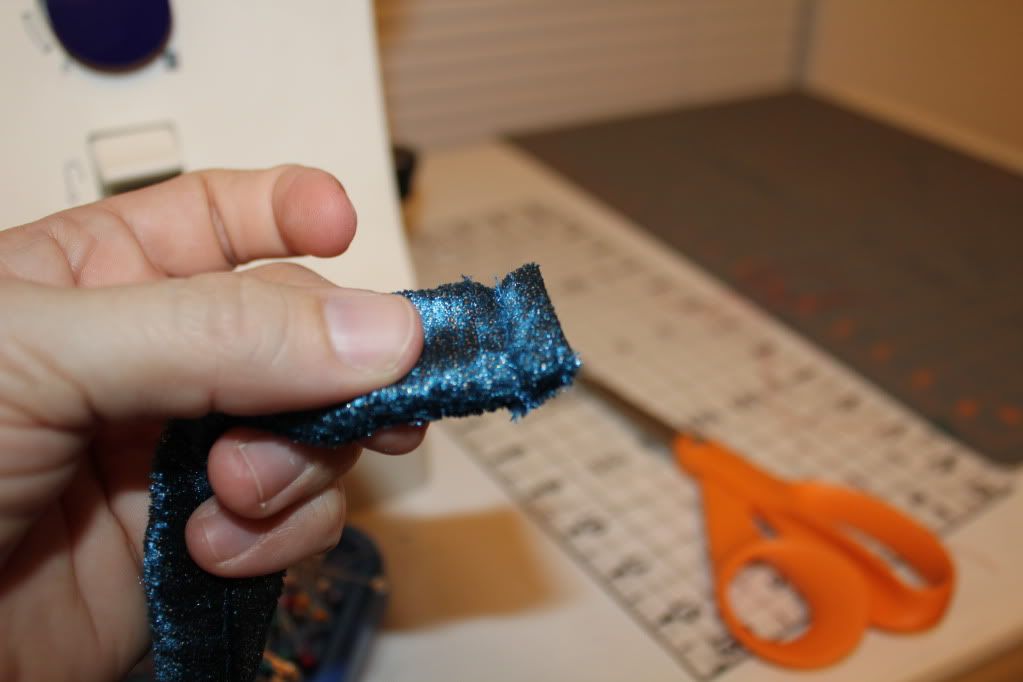
7. Set the strip aside. Next, we will make the superman logo. Freehand a diamond and then draw in your letter. Carefully cut out the diamond shape and also the letter.
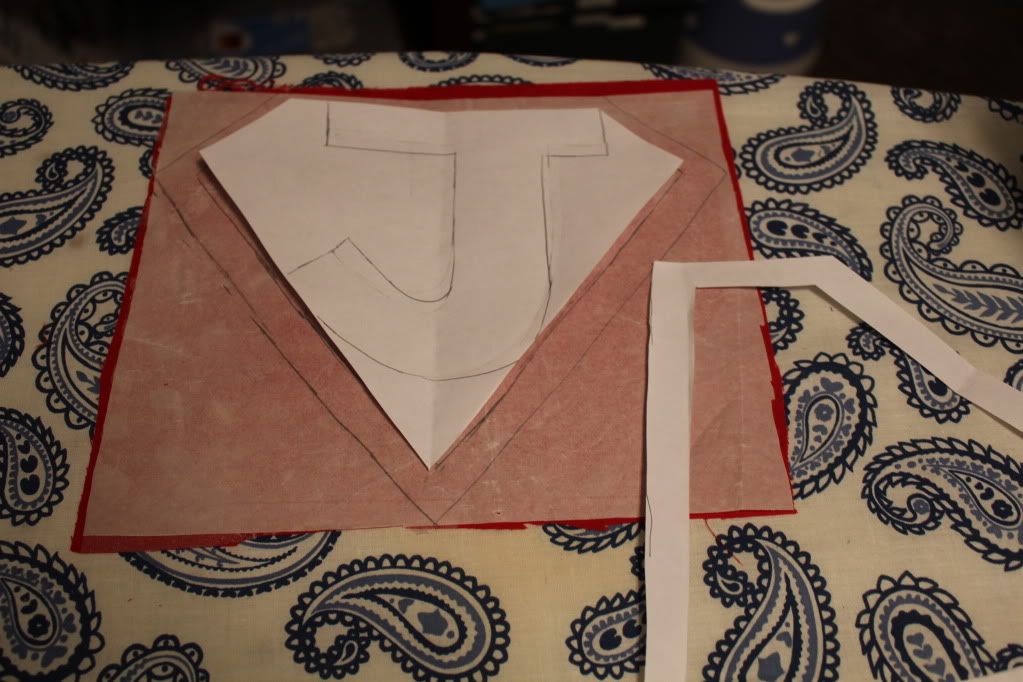
8. Iron on wonder under or another heat bond interfacing to your contrasting fabrics. This helps keep things in place when sewing. Then trace the logo shapes onto each contrasting fabric.
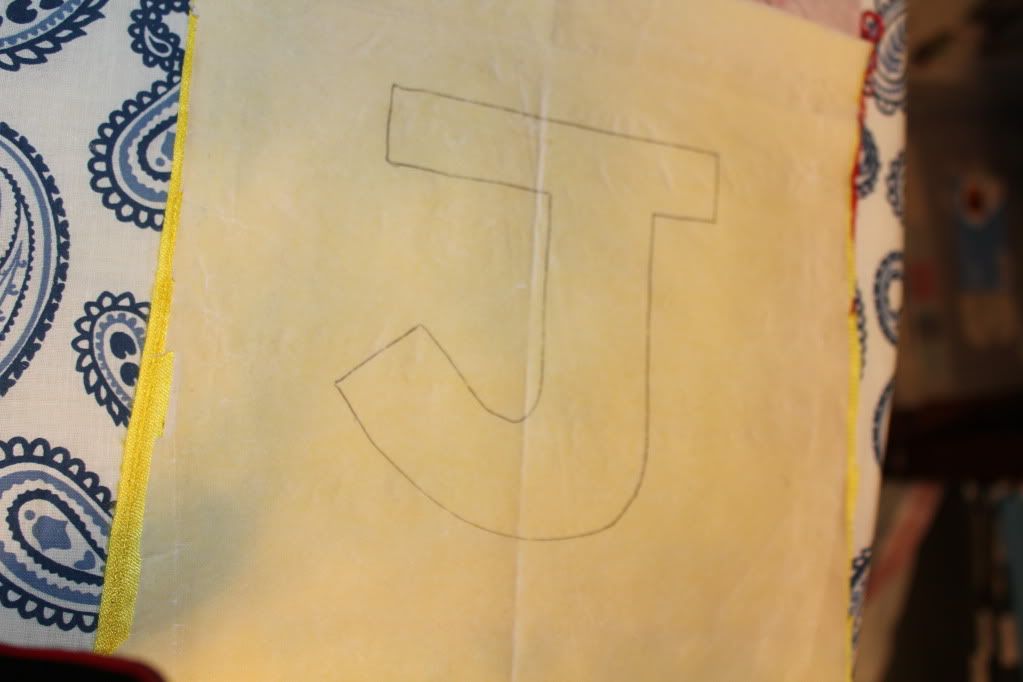
NOTE - You want to use the letter template upside down, so that from the RIGHT side of the fabric, the letter will be correct and not be backwards. See the J, and how I made a mistake? I caught myself before I got too far, but this is very important.
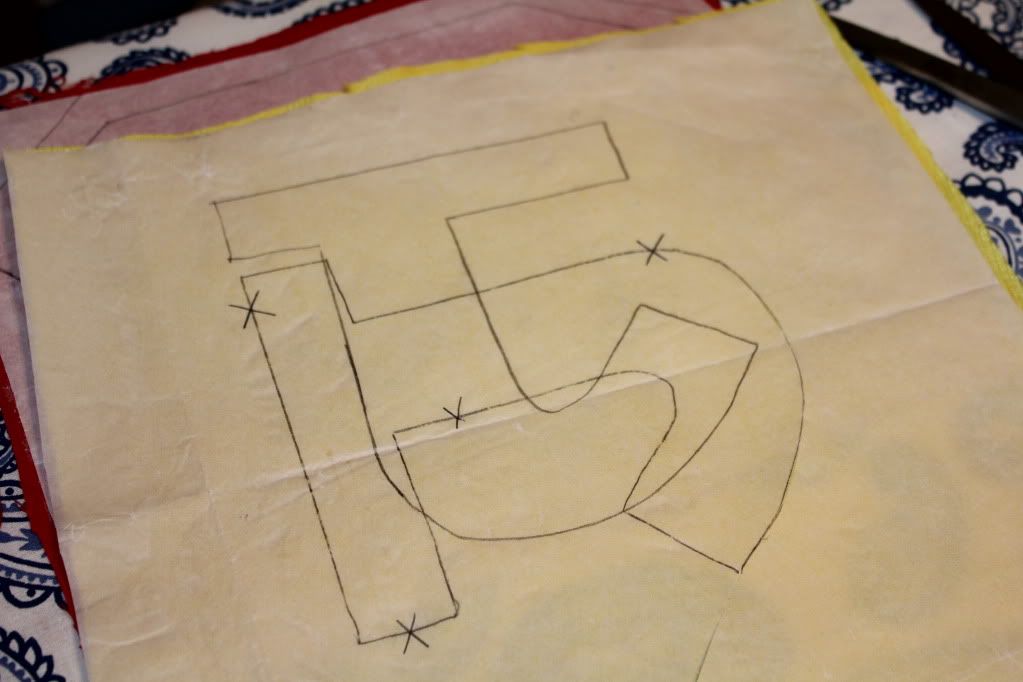
9. Cut the logo out of each fabric. Then you can lay them on your cape and find the right positioning. I wanted long capes, that would last a while for the child, so I made the capes long and put the logo near the bottom so it could be seen. For a bigger child, you could always put the logo near the top (shoulder blade height). If you don't like a pucker when you do this (see how the red cape looks when laying flat), then I would use an interfacing on the back of the fabric before you pin on the logo.
10. Get the rest of the cape fabric and fold in half, making a square shape. Then, fold one part of the fabric down, so you can find the center line of the cape to put the center of the diamond on.
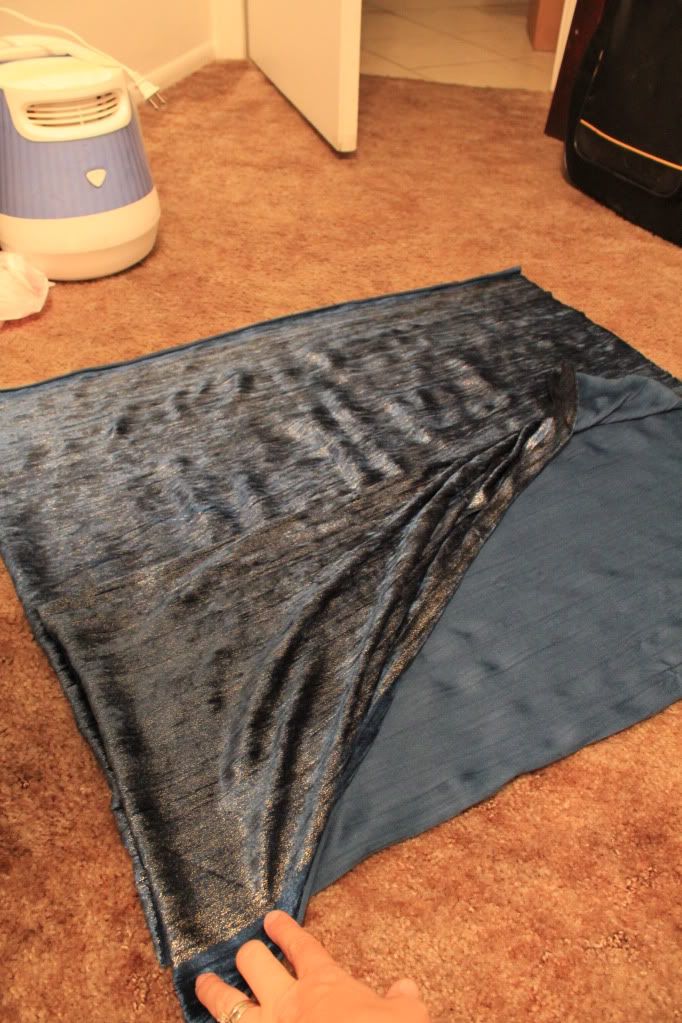
Mark this line with several pins (I used 3), especially if the fabric you are working with doesn't iron well.
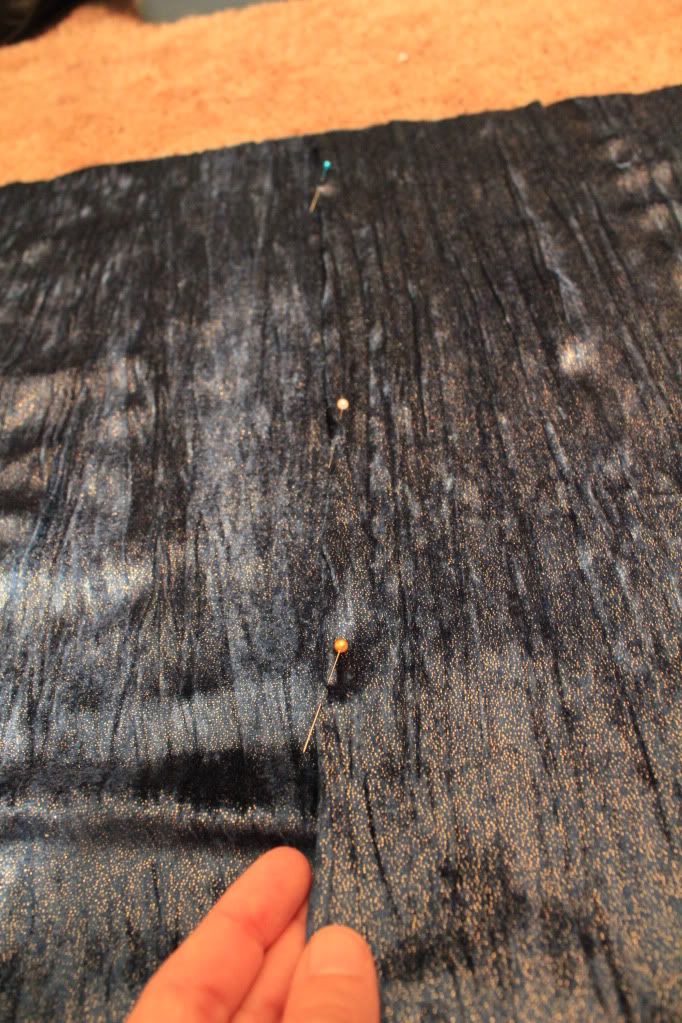
11. Pin on the logo to the cape in a location you are happy with. I used the pins to help me line it up straight.
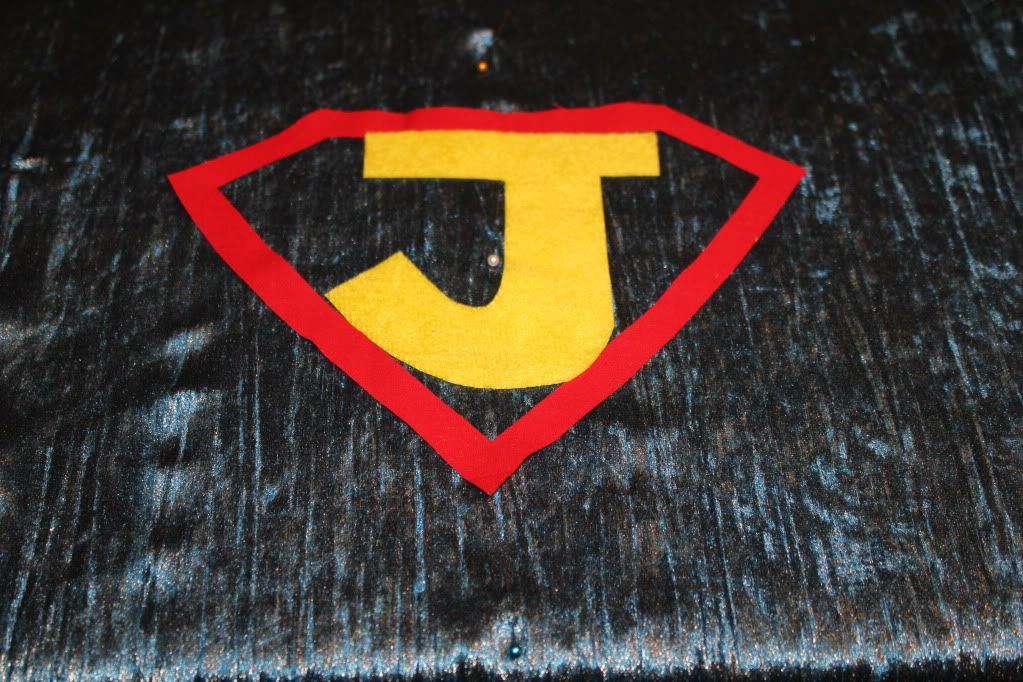
12. Iron the logo on.
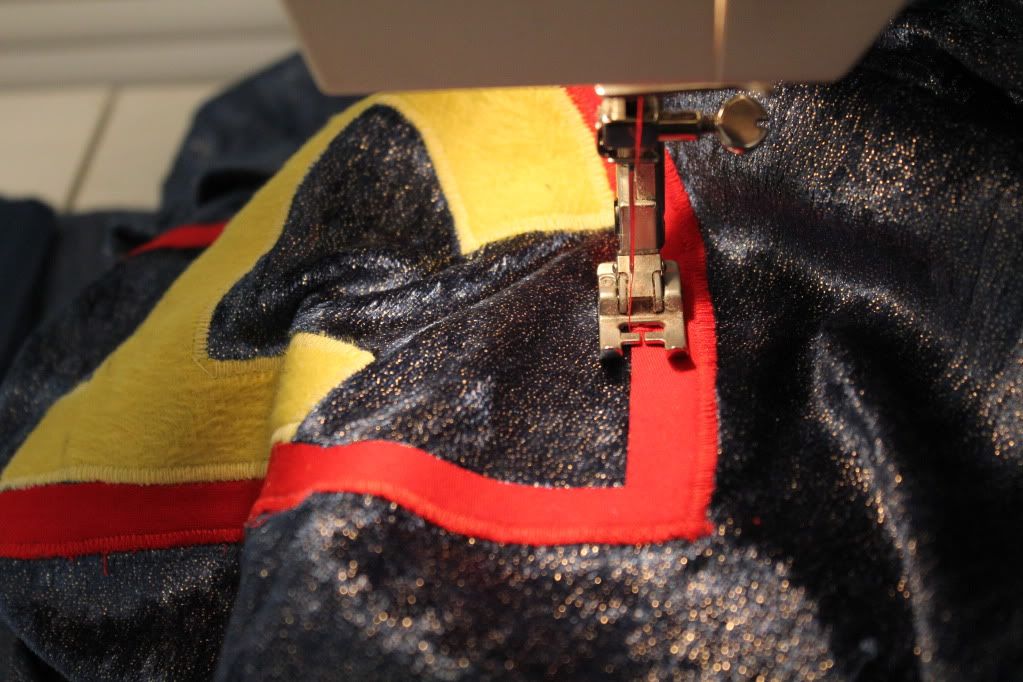
13. Sew the logo on (with or without interfacing) with a zig zag stitch. My machine doesn't have a lot of options, so I just turn the knob to zig zag, set the stitch pretty wide, set the stitch size pretty low, and try it out on a scrap before I go to the project piece. By the way, my machine is a Pfaff Hobby. I need to upgrade soon.
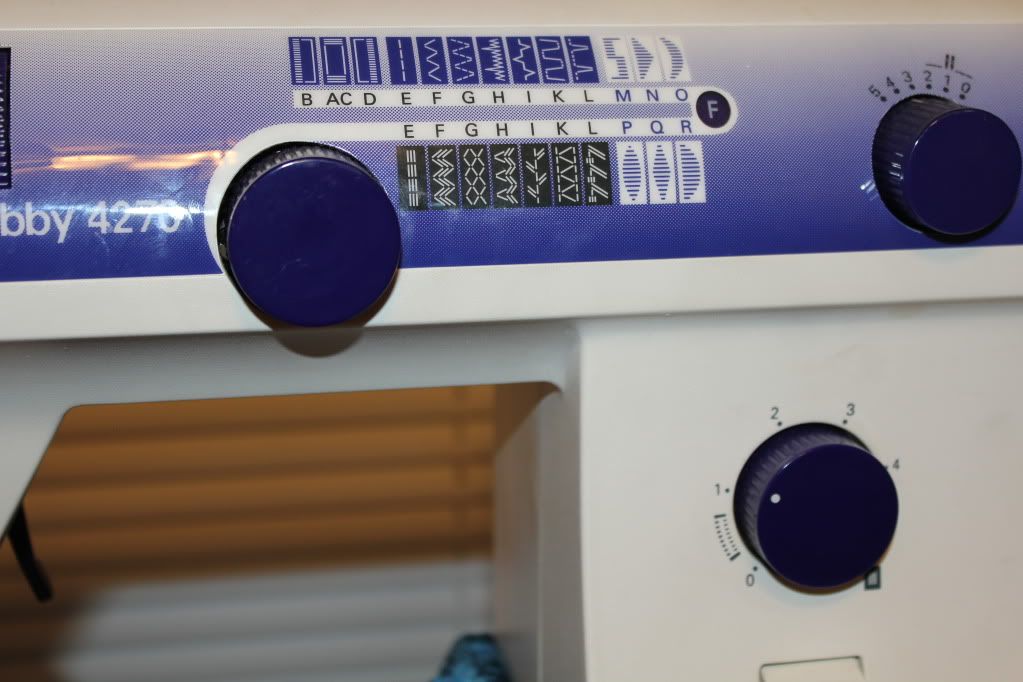
You'll need to switch thread colors for each contrasting fabric color you use.
I had both yellow:
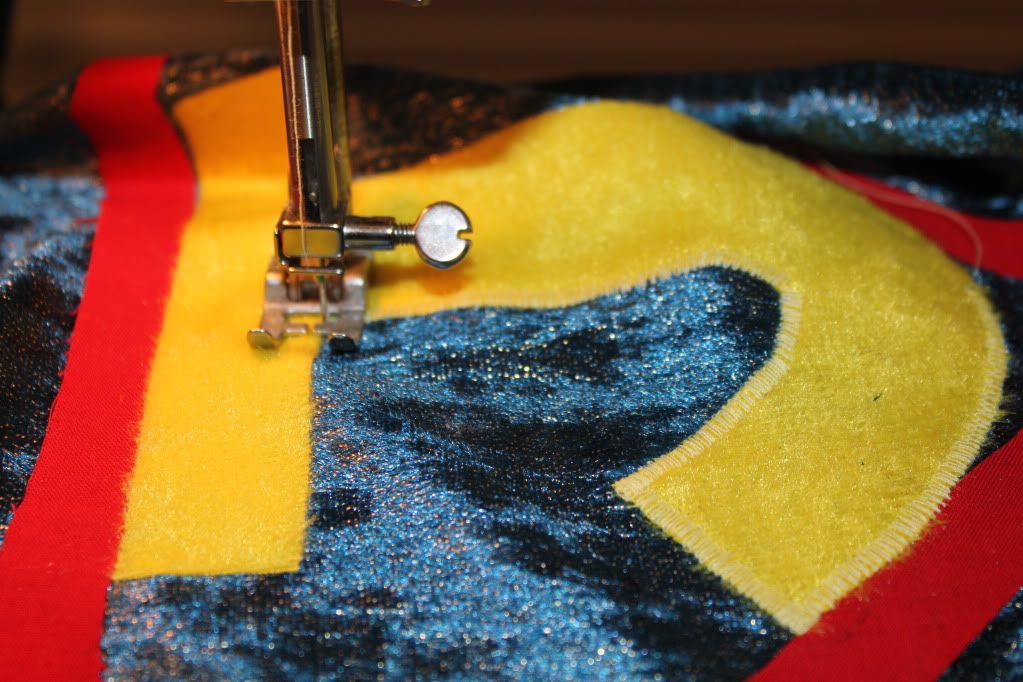
and red:
13. Now you are ready to sew the cape together. Take the cape with logo and put right sides together and sew the left side, bottom, and right sides together.
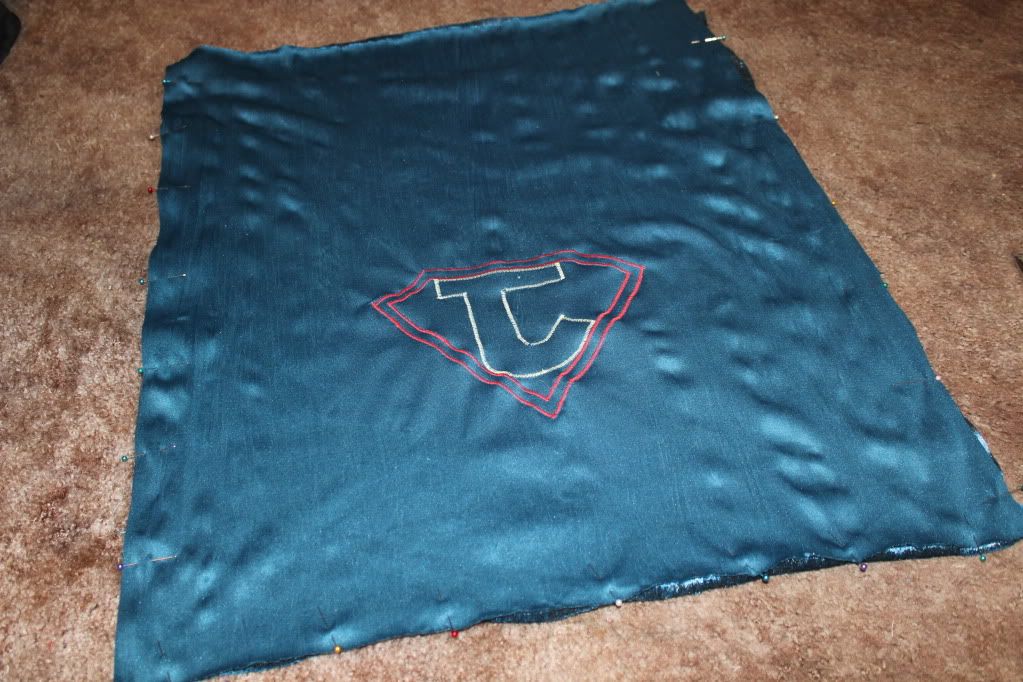
NOTE - I pinned after laying it down to be sure it would lay flat and not skew the logo.
14. Turn the cape right side out. Next, fold in the top raw edges about 1/2 inch to an inch and pin.
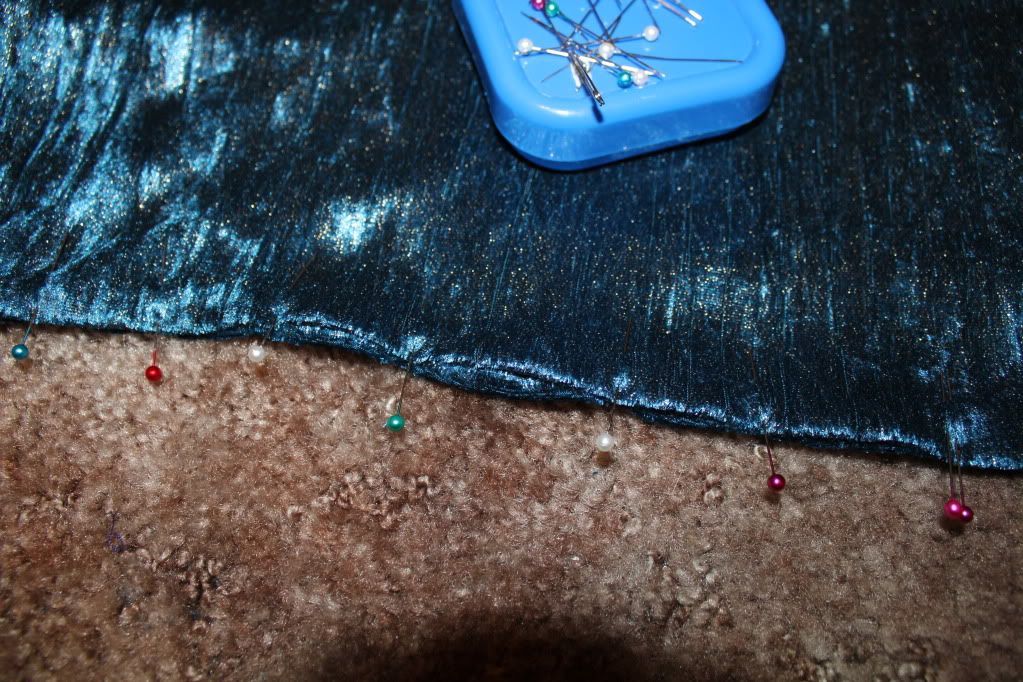
This will help you sew it closed without leaving raw edges or having to hand stitch anything. Top stitch around all three closed sides to make for a more professional finish if desired.
15. Next, we are going to pin the cape to the strip we made before which will tie around the child's neck. First, find the middle of the strip and the middle of the cape and pin that in place. The side of the strip that we haven't top stitched is to go to the top of the cape.
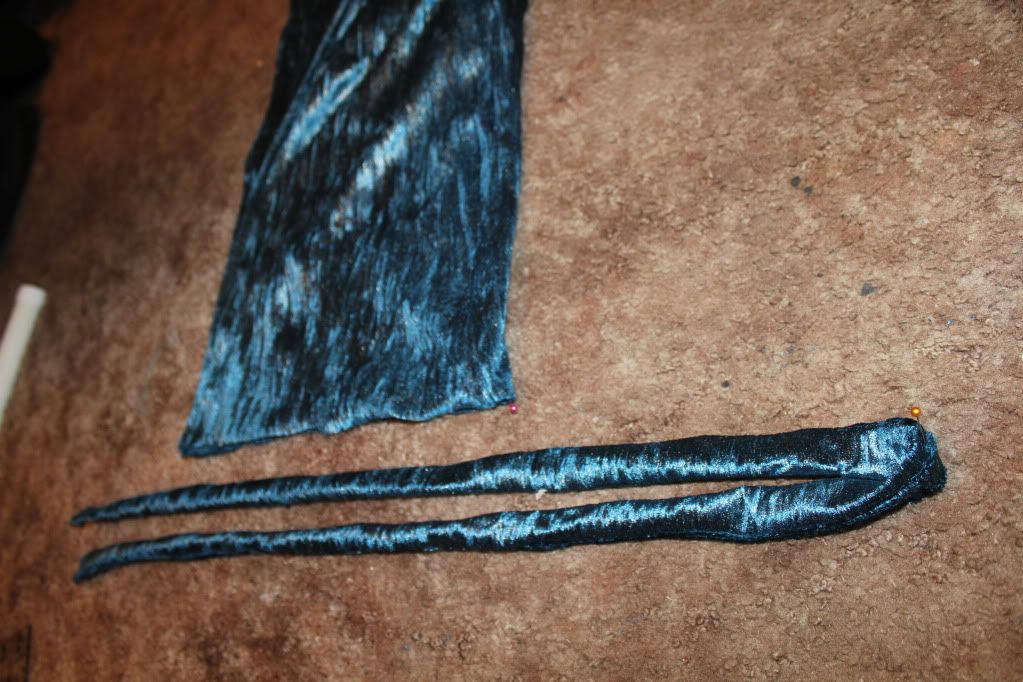
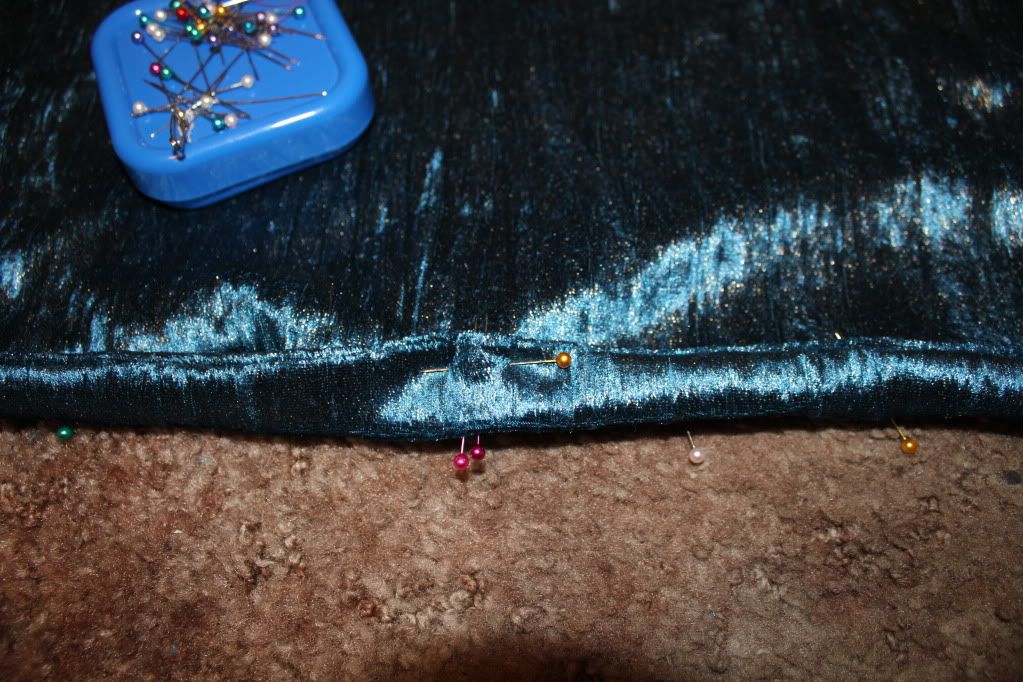
NOTE - I reminded myself which pin was at the center of the cape with a double pin.
16. Working outwards, make pleats from the center and pin each pleat to the tie. I like to do one side at a time, all the way to the end, and try to make each pleat the same width/depth.
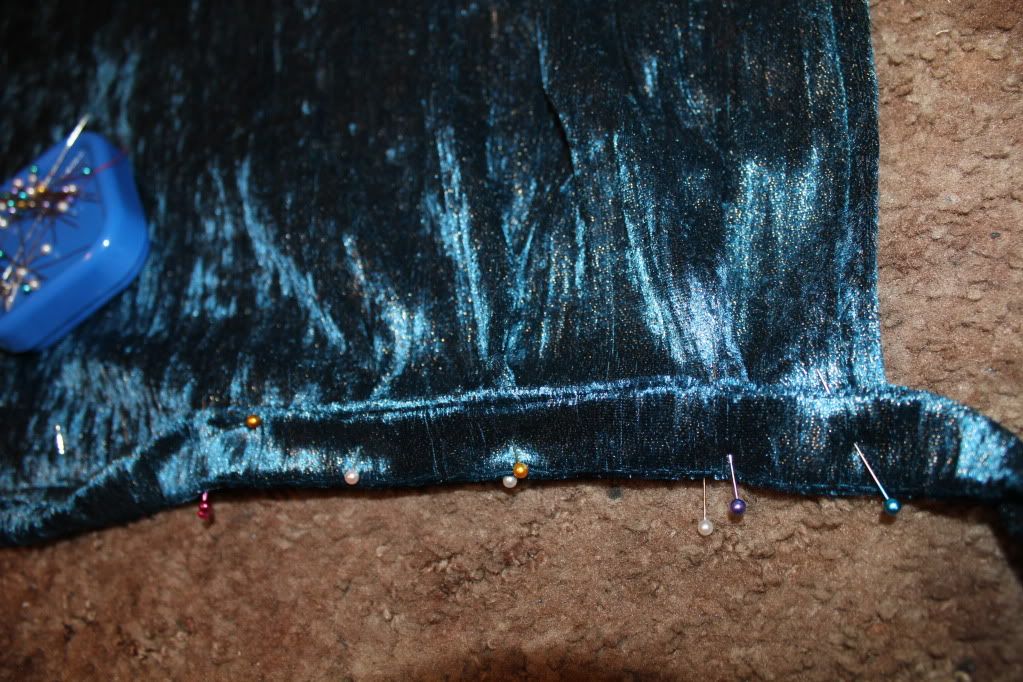
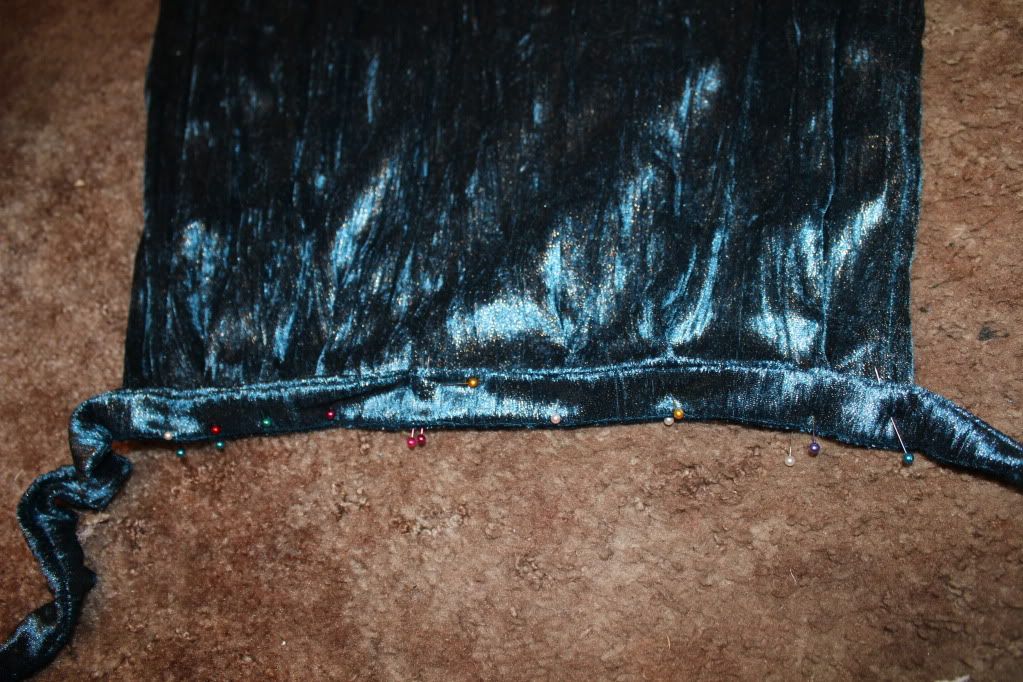
17. At the end, compare the ends of the tie and see if it is about the same leftovers for the bow.
18. Then, sew all the way down the strip on the side you haven't sewn before.This can be very thick so sew slowly. It helps the feed dogs keep up with the needle.
19. Lastly, sew the bottom of the strip to the cape only. This is our final step.
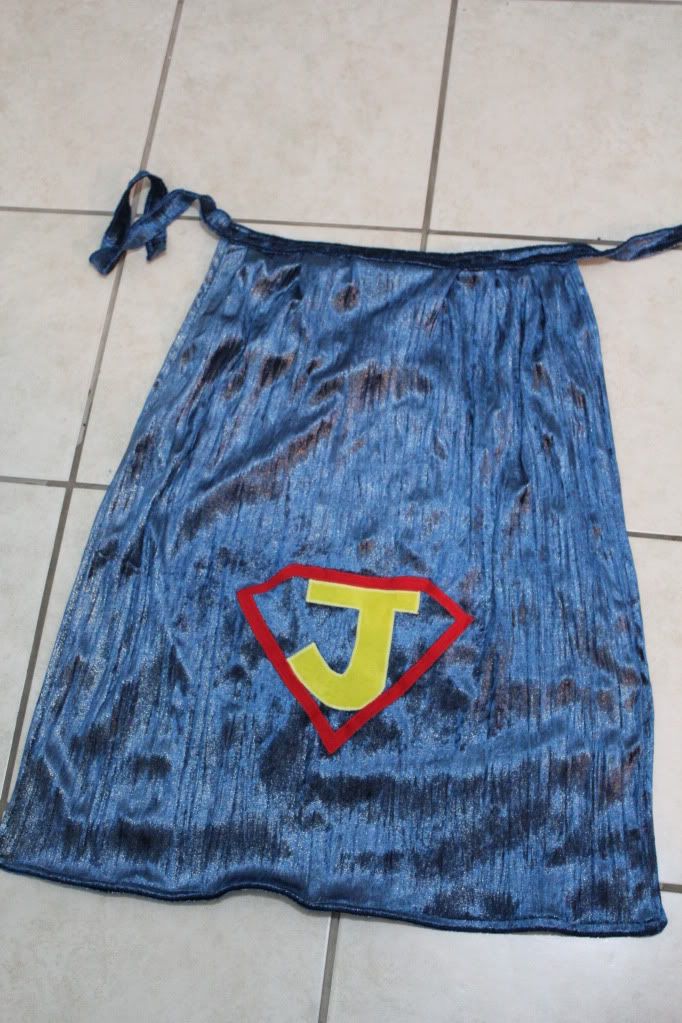
Yay! We finished!
Did you make it? Do you have some cute other ideas for capes? I personally think this looks like a great one for a magician! Perhaps stars are in order!!! If you don't want to make this, I also am selling capes for Halloween or gifts in my shop :)


