Our daughter is having her baptism at the end of October, so I've been busy (as a bee) dreaming up a fun little party that doesn't cost too much.
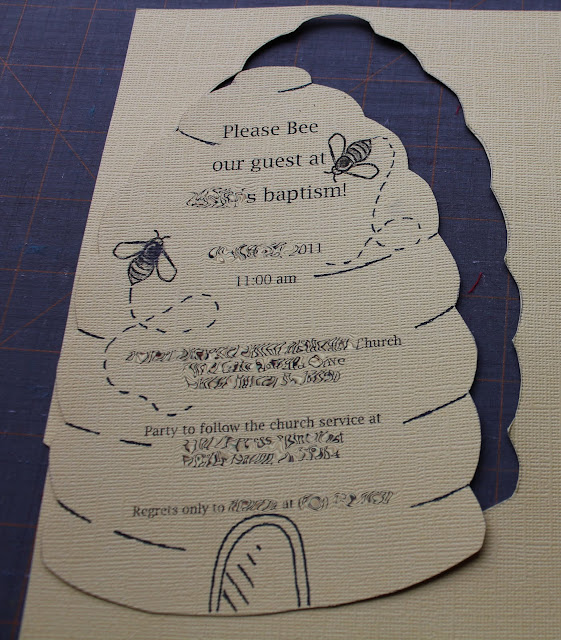
One of the first things I thought of after deciding to do a "bee" theme is that making your own invitations isn't really that difficult. So I thought it would be great to have a beehive as an invitation.
First, it came out much better than I thought. I am by no means an artist. Another question I bet you are thinking is: how do I get envelopes for my cards? Well, I bought mine with envelopes.com. They are great and for 50 envelopes, it was only $9.99 plus shipping. So far so good! Those came in the mail and I was off to the races.
I decided to keep the costs down, I would make 2 invitations per page of paper, which basically means a 5 x 7 invitation. That would mean an A7 envelope. I found this out by using the google and asking "What envelope size do I use for a 5 x 7 invitation?". It told me the answer. Smart google.
Next, I went to my local Joann's and picked up some letter sized scrapbook paper. I wanted the thick kind and my choices were limited to 2 yellow papers. One had gold in it (yuck!) and the other had a canvas feel. I personally thought the canvas feel had a more "hivey" look, so I went with that one.
I needed 14 invitations so I bought 9 pieces of the paper just in case I made printing mistakes.
Next, when I got home, I had to measure the paper and cut it down to 8.5 x 11 inches because that is what I was using as a paper size in the word template. Here is the word template by the way. You can edit it however you would like. I just love the bees I got from clipart!
Then, I drew out the hive shape I wanted the invitation to have. This was a bit trickier because it had to be in the 5 x 7 size for the envelopes and also contain all the words. I cut down a plain sheet of paper to 5 x 7.
Next, I printed out the words on my fancy paper. Be sure to do a couple tests if you change the wording template to be sure it will fit in the hive. Once I was sure, I printed out 9 copies (enough for 18 invitations). Then I traced the hive onto each invitation. I folded the hive across in a straight line as a guide to be sure the hive wasn't crooked, and aligned the fold with the last line on the invitation about the RSVP. It worked like a charm.
Then I cut out the invitations and decorated. I loved adding the dotted lines from the bee stinger to show a little movement. I think this was the best part of making the invitations. What do you think? Does it look like a beehive?
Be sure to stay tuned, more party DIY to come!
The Best Way To Digitize Old Photos
2 weeks ago


0 comments: