 |
| Inspiration photo |
First, select your fabrics. A great part of this project is showcasing all the fabric you may (of course we have too much fabric!) have collected and using some of the pieces to justify to your loved ones just why you have to have more fabric :)

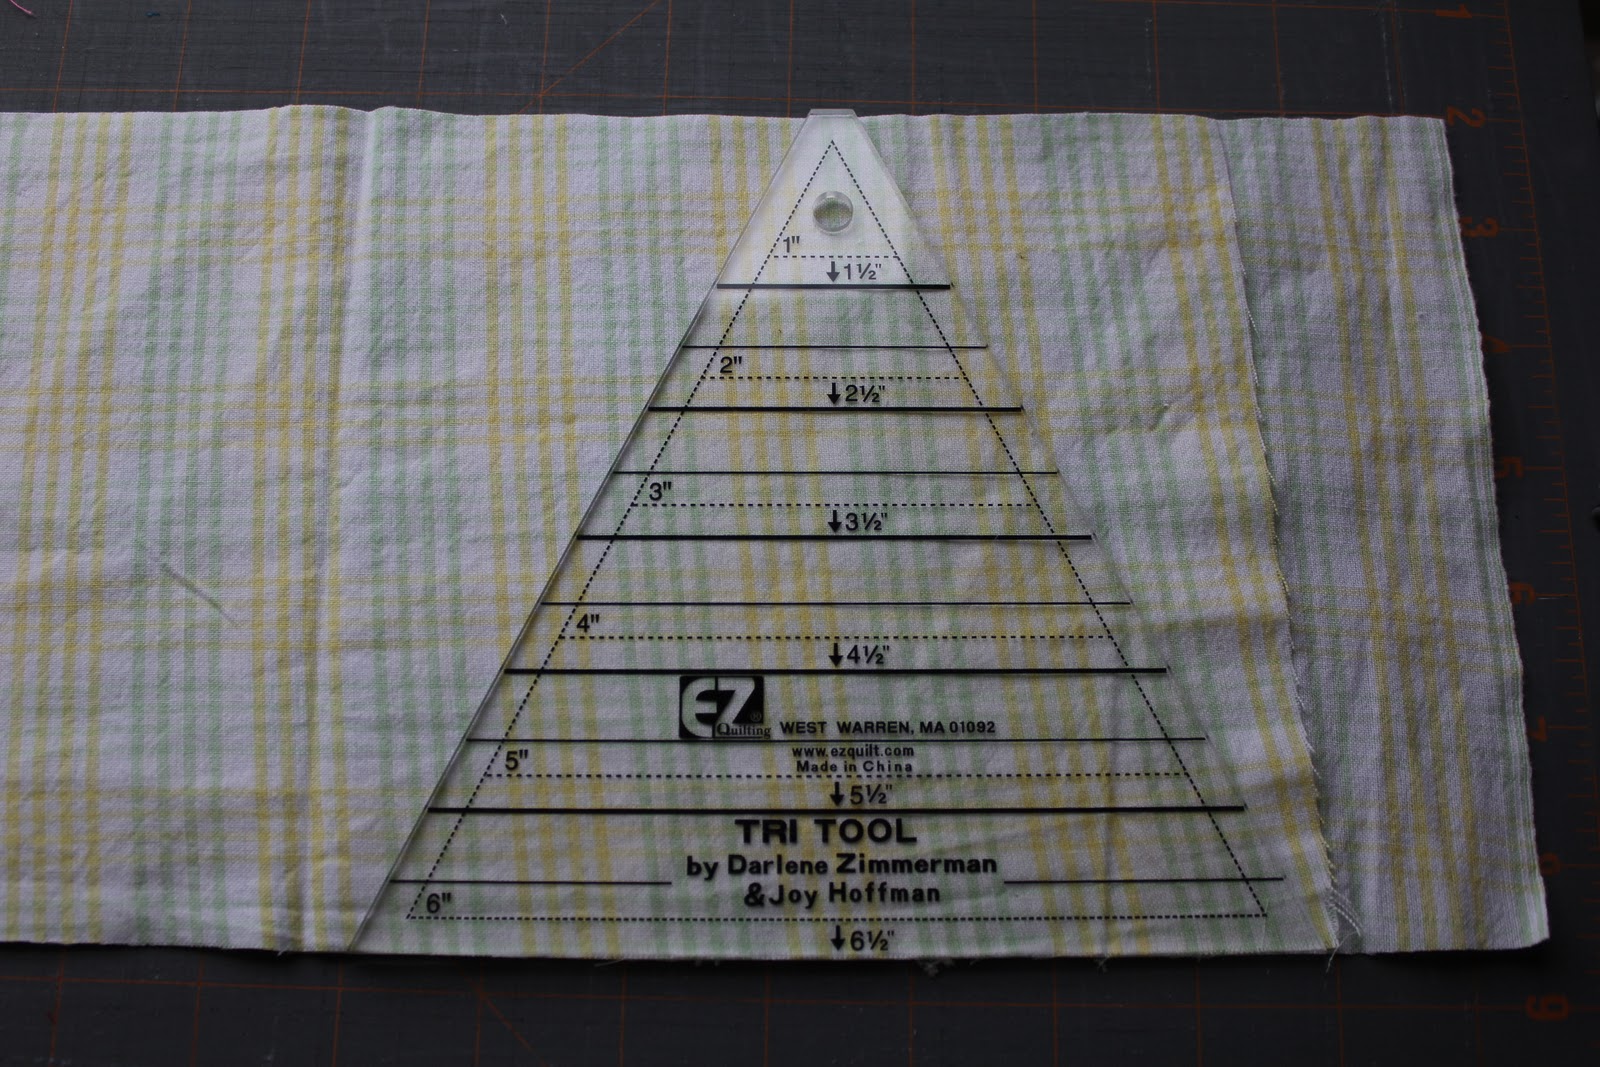
Next, cut 6.5" wide strips of each fabric so that you can cut your triangles. I use trirecs tools to cut triangles because I have them and they were the right type of triangle for me (these are icoscoles if you wanted to know). I used to teach high school mathematics.


Cut as many sets of triangles as you would like. Each set will make one flag. For some flags, one side of the flag was in one fabric, and the other side was different. It depends on your taste.
Next, I cut a 2.5" strip for bias fabric (to make the banner). This was a fabric I got at Walmart last Christmas to make a wonderful casserole carrier from Homemade by Jill. Anyways, cut those and sew the ends together. You will have to fold and iron to hide the raw edges, just like making bias tape for quilts. Here is a fabulous tutorial if you don't know what I mean.

Then I sewed together the pairs of flags, wrong sides together.

Then I turned each of the flags right side out carefully using a plastic tool.


Here is how we used them in my daughter's six month pictures and at the party.


Pin It
Want to see more of the bumblebee party? Part 1- Invitations or Part 2-Headbands. Take your pick :)


0 comments: