Our daughter is having her baptism at the end of October, so I've been busy (as a bee) dreaming up a fun little party that doesn't cost too much.

One of the first things I thought of after deciding to do a "bee" theme is that making your own invitations isn't really that difficult. So I thought it would be great to have a beehive as an invitation.

First, it came out much better than I thought. I am by no means an artist. Another question I bet you are thinking is: how do I get envelopes for my cards? Well, I bought mine with envelopes.com. They are great and for 50 envelopes, it was only $9.99 plus shipping. So far so good! Those came in the mail and I was off to the races.

I decided to keep the costs down, I would make 2 invitations per page of paper, which basically means a 5 x 7 invitation. That would mean an A7 envelope. I found this out by using the google and asking "What envelope size do I use for a 5 x 7 invitation?". It told me the answer. Smart google.

Next, I went to my local Joann's and picked up some letter sized scrapbook paper. I wanted the thick kind and my choices were limited to 2 yellow papers. One had gold in it (yuck!) and the other had a canvas feel. I personally thought the canvas feel had a more "hivey" look, so I went with that one.

I needed 14 invitations so I bought 9 pieces of the paper just in case I made printing mistakes.

Next, when I got home, I had to measure the paper and cut it down to 8.5 x 11 inches because that is what I was using as a paper size in the word template. Here is the word template by the way. You can edit it however you would like. I just love the bees I got from clipart!

Then, I drew out the hive shape I wanted the invitation to have. This was a bit trickier because it had to be in the 5 x 7 size for the envelopes and also contain all the words. I cut down a plain sheet of paper to 5 x 7.
Next, I printed out the words on my fancy paper. Be sure to do a couple tests if you change the wording template to be sure it will fit in the hive. Once I was sure, I printed out 9 copies (enough for 18 invitations). Then I traced the hive onto each invitation. I folded the hive across in a straight line as a guide to be sure the hive wasn't crooked, and aligned the fold with the last line on the invitation about the RSVP. It worked like a charm.

Then I cut out the invitations and decorated. I loved adding the dotted lines from the bee stinger to show a little movement. I think this was the best part of making the invitations. What do you think? Does it look like a beehive?

Be sure to stay tuned, more party DIY to come!
I was recently asked what I want to do for my birthday and thought -- bowling?? a movie?? Blah! There wasn't anything I need or wanted to do, and then I saw this post:

http://mixmingleglow.com/blog/?p=1358

This girl is awesome! She turned 38 and did 38 random acts of kindness (RAOK) throughout the day. I am going to do this (although I'm going to do it on the Saturday before my birthday).

Do you have any ideas of what I can do that are cheap but would mean something to people? I want to touch people but can't give 45 coffees out or something like that.

1. Collect trash
2. Help push carts back from a parking lot
3. Leave a note of encouragement in a self-help book at the library
4. Write thank you notes around town
5. Fill parking meters downtown (do we have those in my hometown? I have no idea!)
6. Pay for someone's meal inside a fast food restaurant
7. Pay for a toll for someone behind me
8. Write a letter to an old friend
9. Hand bottles of water out to someone on a jog
10. Go to the playground and leave some change for kids to find (carefully)
11. Tape change to a few vending machines in the hospital
12. Read a story to kids in Barnes and Noble
13. Cut a neighbor's lawn (and mow my own of course!)
14. Leave a thank you note with a treat to our mailwoman
15. ??

I need 16 more ideas! So any you can think of would be great :)

Millie's First Rice Cereal


We tried Rice cereal with Millie last night at dinner time. She did really great and it is a fun part of having a baby!
Pin It

Remember the I See Me! books? Well, in addition to using the 20% OFF coupon code INCREDIBLE until August 31, 2011, you can also get free Personalized stickers!
They have books for introducing a baby's name, pirate adventures for boys, or fairy tales for girls.

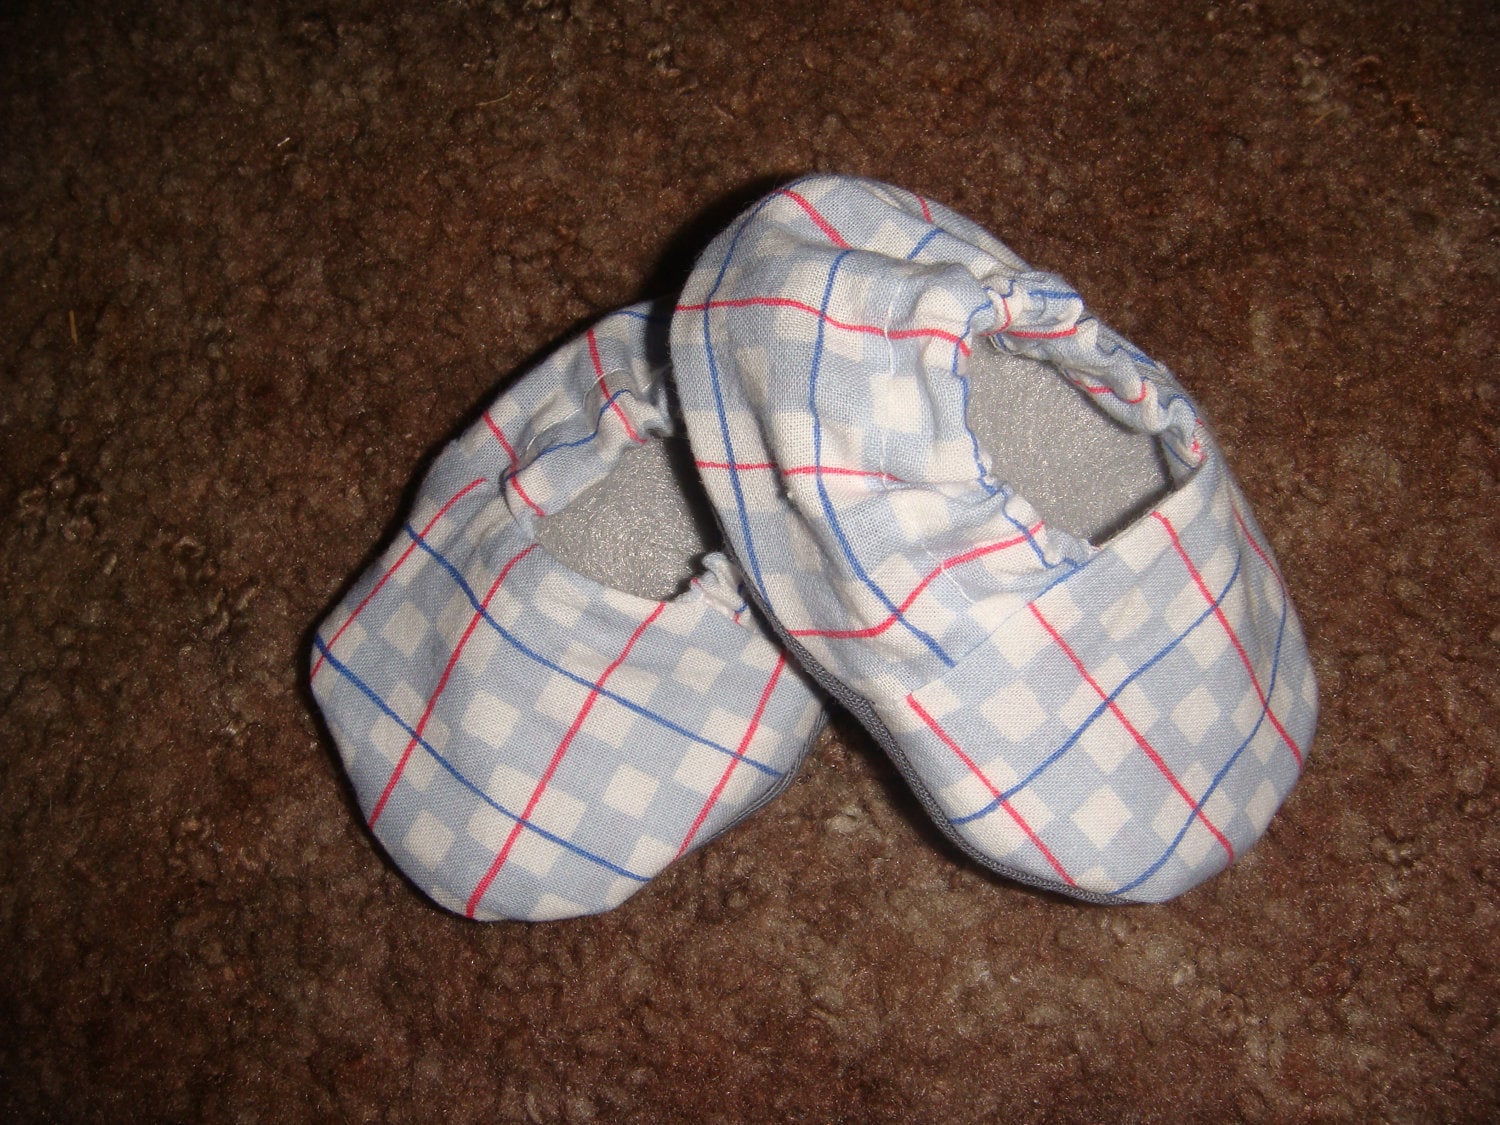
Boy's Shoes - Gray Plaid

I love this fabric for a pair of little boy's shoes. These are 3-6 months.

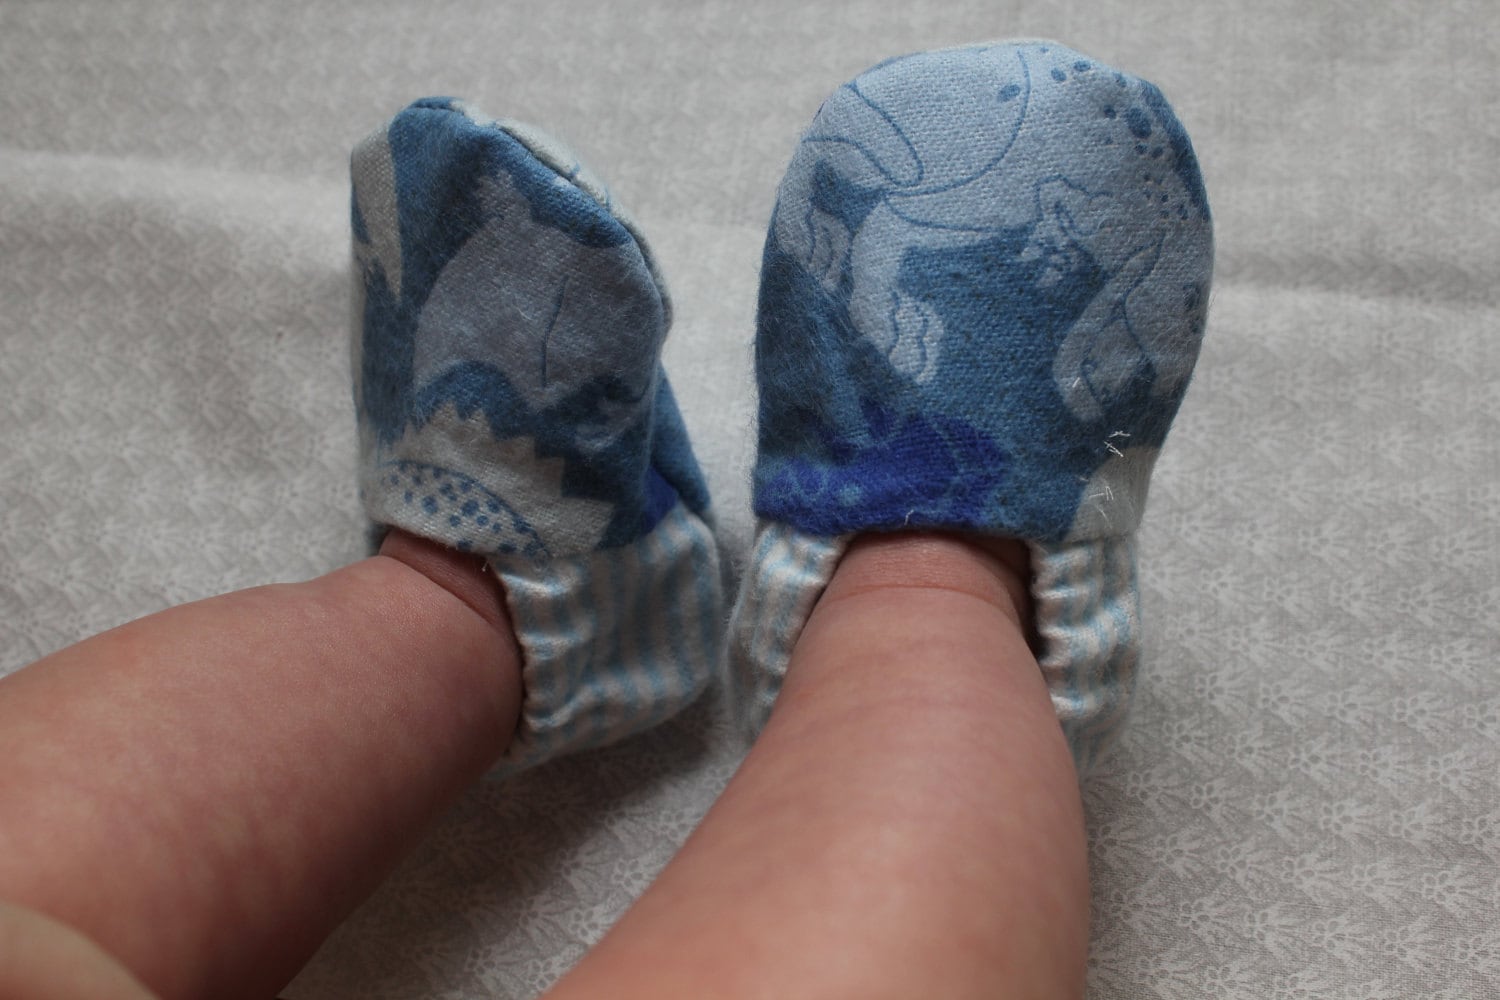
These actually also have a felt liner so there are no rough edges inside. I also have the same type of style with dinosaur fabric.
Have you ever seen the Tatertots and Jello blog? I love love love this blog and check frequently for crafting ideas, from quilting to homemade gifts. She is very creative and has unique ideas (puff quilts anyone?).


So many different ways to use these, but I would love to use them in my etsy shop packaging if I won the giveaway! What would you use them for?


She is currently having a giveaway for Twisted Sugar Twine, which is sooo cute!

I See Me! Books

Have you ever seen the I See Me! books? They are customizable. I first heard about them when my dear friend, J, bought my daughter a book....in it, colorful, beautiful animals spell both her first and last name in rhyme. It is so imaginative and fun!

Pin It

They have other options instead of introducing a baby's name, like pirate adventures for boys or or fairy tales for girls.

Here is a picture of the letter pages for the My Very Own Name book we have:


Well, until August 31, 2011, you can get 20% off these books with the code INCREDIBLE! If you saw the Eversave coupon a while back, I think you could combine with that gift certificate for an even lower price.
Ok, I just made this outfit for a baby gift size 0-3 months....what do you think?

Pin It
I rather like the polka dots! And it is more grown up than the normal nursery material with animals. It was simple: drew a pattern of the tie, ironed on wonder under (heat bond actually), ironed on the tie to the onesie, sewed the seams with a zig-zag stitch (in Navy blue thread to match), and then washed to be sure it would stay together. I'm so pleased it came out so well!

These are on etsy -- PM me if you like the set but want a custom order.

New Post, New Blog -- Almost

Wow, it has been almost a year since I last posted.

In that time, a lot has happened. I got pregnant, we moved (without selling the old house), we have a buyer for the house, we tried one type of short sale, we got denied, we are in the process of another type of short sale, I started a new job, we had the baby (a girl - M), and I started an etsy business.

Which leads me to my new point of view for blogland - - CRAFTING! I love it, and so should you. Even if you aren't all that creative, you should try crafting just for the heck of it. And in that line, I would like to share my new creations from etsy. Keep in mind, most of what I create, I create because I love the process. I love the feel of fabric, the clack of the sewing machine, the little fuzz that scissors get on them when cutting thick fabrics.....even though that means more cleaning. So stick with me, invite your friends, find some cool stuff to send to me. We can have fun!
Remember this monstrosity? Well, it is no more! What did I do for four straight days last weekend? Well of course, work in the steamy Florida heat and finally lay down the paver walkway and landscaped the side of our house. Let me remind you of what this all looked like last February (I bought the pavers last summer planning on a winter project...but winter turned to Labor Day).
We had already removed all the boards and the sheds, as explained in three previous posts, go there to review how much work had already taken place - Part 1, Part 2, and Part 3. You can tell just how steamy it was in the picture above. That's my dad and sister helping to dig out the place we would need to level before we put in the pavers.
And more digging. This shows the strips of plywood we put down with stakes to mark the edges of the path and to give us a level height to work from. We leveled the plywood tops with a string and level that we marked off from the height of the pool deck so the pavers wouldn't be very far away from that. It was hard to be perfect. You can see in the above picture that we were working on leveling the dirt before we starting adding leveling sand to perfect the surface to lay the pavers on top of.
Here you can see we put down leveling sand on top of the dirt we had leveled the same way. This involved using the board my dad is holding and scraping it along the top of the plywood (shown in the right of the photo). It is called a screed. So that helped us make the dirt level and also the leveling sand level.
The path almost done with sand; nice and level.
Whole path done. Now to lift all the pavers and put them in place on the path. I picked some pavers that would create a natural looking path, not square and it was neat how they fit together like a puzzle.
This is what the path will look like....next we used polymeric sand to fill in the gaps. Polymeric sand does not promote weed growth, doesn't float away like regular sand/dirt, and also will harden somewhat. Follow the directions on the package...and one bucket of that stuff goes a long way.
Here you can see I next put down landscaping edging along the sides of the path, filled in the pathway with regular dirt to keep the pavers locked in place, and mulched and planted the sides of the path with Florida native species. I'm hoping these won't die like the last 3 sets of plants I tried.
Ta da! Just a reminder of what this looked like before! What a difference!


I hope you enjoyed this....I'm so glad it is done. And just in time to put our house up for sale because I got a new job in Tampa. Whew! And we have an open house this Saturday (tomorrow) that hopefully goes well :)
First, I would like to say that it is fun using coupons and doesn't have to be a huge pain in the booty! You can succeed without really trying, which is always exciting and helps your monthly bottom line.

Here are the tips I have:

1. NEVER SKIP A WEEK BUYING THE COUPONS.
  • I use TaylorTown coupon preview to be sure there are inserts and which kind. http://www.taylortownpreview.com/ -- There are links for each week's coupons and also a yearly calendar to know when there are coupons and when there are none (major holidays usually don't have coupons).
  • If there are only the SmartSource (SS) and RedPlum (RP) inserts for a particular week, then I get 4 Sunday papers (and check to be sure all inserts are in there before I leave the store). If there is Proctor and Gamble (PG, usually at the beginning of a month) or extra coupon inserts, then I get more (6 is usually my max).
2. YOU DON'T HAVE TO CLIP THE COUPONS OUT EACH WEEK.
  • I take each insert and make a mega-insert by combining the like pages and keeping one large insert for each type (one mega for SS and one for RP, etc). I write the date on the top of the mega-insert and keep them in chronological order with the oldest insert at the top.
  • http://frugalsuz.blogspot.com/2009/05/coupon-organization-frugalsuz-style.html - This is the link that shows the same organizing style I use, but I do not do anything paste making the mega-inserts.
3. I HAVE FOUND TRIED AND TRUE SOURCES FOR THE BEST DEALS AT PUBLIX, CVS,
AND WALGREENS (WAG) EACH WEEK.
  • I do NOT find each deal myself. I use other people's information to match sale prices and coupons that are out there to make my money go further.
  • Publix - www.southernsavers.com - Just click on the box that says Publix and look for the blog post with the correct dates. Sales change on Thursday, she puts the shopping list up and I usually go print out my info on Wednesdays so I am ready on Thursday afternoon. Since that is when the deal is newest, I like to shop Thursdays because normally everything is still in stock. NOTE - Publix will give you a raincheck, which is great if you get there and they are out, but you have coupons that won't expire for a while.
  • CVS & WAG - www.frugalsuz.blogspot.com - Each week, my lovely friend Suz will post a blog that talks about the upcoming week's deals at both CVS and Walgreens. Again, she tells you which insert the coupons are in and all you have to do is make a list of what items you'd like with the coupons.
4. PRINT OUT YOUR DEALS.
  • Publix - Southern Savers has a unique shopping list that will allow you to only select each deal you'd like, and she includes the coupon insert type (SS, RP, PG etc) and the date. You can print your list on your computer. She also includes printables from competitors like Target and Food Lion and also printable coupons from the web.
  • CVS/WAG - I cut and paste the deals frugalsuz talks about into a notepad file, then delete ones I'm not interested in, and use that list at the store.
5. CLIP YOUR COUPONS!
  • Cut out the coupons from your mega-inserts that you need to bring to the store, which match your deals.
6. PUT YOUR DEALS WITH COUPONS IN YOUR PURSE/BAG/CAR
  • I paperclip the coupons to my shopping list and leave it in my purse for Thursday afternoons at Publix, and Sunday mornings at CVS/WAG.
Tips for each store:
  • Publix
  1. Get rainchecks if they are out of stock.
  2. Use Competitor coupons. They'll take Register Rewards (RR) from WAG, Target Q, Food Lion Q, and any other type of grocery store coupon as long as you have one relatively close by.
  • CVS
  1. Hand your coupons over to the cashier in this order: $5/15 ($X amount off $X purchase) CVS Q, ECB, Manufaucturer Q.
  2. My CVS will take any expired CVS coupons, including the fantastic Extra Care Bucks (ECBs).
  • WAG
  1. Hand your coupons over to the cashier in this order: RR, Manufacturer Q, in-store coupons.
  2. Walgreens advertises that Register Rewards/RR's can be used like cash, but they are actually manufacturing coupons that are only good at WAG (or in my case at Publix, too).
  3. The catch is that you can't "roll" RR's to something made by the same manufacturer. Rolling is when you buy an item, get a reward, and use that reward to buy more of the same item, then get another reward. At WAG, you won't get the second reward. You WILL get a second reward at CVS, as long as you haven't reached your limit.
  4. You can only NOT roll to the same manufacturer's items. For example, if I bought a Gillette razor, got RR, and then used that RR to buy a Kellogg's deal for more RR, it WILL give me more RR. It is based on the MANUFACTURER.
  5. They have a strict coupon rule: # of items must be greater or equal to the number of coupons (although their store coupons do not contribute to this count).

Publix - 7/17

Sorry no pictures, but this week's deals at Publix are really amazing!

3.99*2 Edy's Fruit Bar [1.99 each]
-3.99 Edy's BOGO
7.99*2 Contessa Frozen Meals [3.25 each]
-7.99 Contessa BOGO
-1.50/2 Contessa Q
2.99*4 Kellog's Raising Bran [.99 each]
-2.99*2 Raisin Bran BOGO
-1.00/2 * 2 Raisin Bran Q
2.19*2 Hershey's Syrup [1.09 each]
-2.19 Hershey's BOGO
4.29*4 Hershey's Bliss Chocolates [1.14 each]
-4.29*2 Hershey's Bliss BOGO
-1.00*4 Hershey's Bliss Q
3.49*4 Juicy Juice [1.25 each]
-3.49*2 Juicy Juice BOGO
-1.00/2 * 2 Juicy Juice Q
3.69*2 Chips Ahoy [1.85 each]
-3.69 Chips Ahoy BOGO
5.49*2 Olay Cleanser (saved 1.50 each on sale) [2.25 each]
-1.00 Olay Cleanser Q
-5.49 Olay BOGO Q
1.00*3 Bic Mechanical Pencils (saved 2.69 each on sale) [.67 each]
-1.00/2 Bic Pencil TARGET Q
2.50 Strawberries (saved .49 on sale)
.92 Tomatoes (saved .62 on sale)
-.50 Q wyb $3.00 produce FOOD LION Q
1.00*2 6 packs of Pencils (10 ct) (saved .85 each on sale)
1.00*2 6 packs of Crayola Crayons (24 ct) (saved 1.65 each on sale)
2.00 Florida's OJ (saved 1.69 on sale)
6.09 Ground Sirloin (saved 1.65 on sale)
5.83 Ground Sirloin (saved 1.58 on sale)
1.49 Eggs
3.35*3 Milk
2.89 Bread
5.19 Half a Key Lime Pie
1.78 Tax
=78.63, saved 88.99 which is 53%!