The master bedroom should be a retreat.  And ours wasn't, at all. Here is what it looked like when we moved in.

 *The brown door above has already been painted white, when I painted the brown paneling.

The first step was to prime (again), and then to paint the wonderful color Martha Stewart's Tidewater matched in Behr paint & primer in one.  It was my first try with the paint/primer combo and I liked it, but I used a lot more paint than I normally do and was worried I would run out of the gallon I had purchased.  When did paint get so expensive?

 This is the color with a horrible flash.  It is much deeper than this.  I'll try to take a daytime picture to give a more accurate representation.
I love the dark wood with the sea green color.  We don't make our bed, by the way.  Ever. But I did for this picture.

The curtains are homemade and were in our last house's dining room.  I like them a lot and the rod, I had as well.  Again it was from out last house.  I hung up the art that we have.  The walls are pretty bare.  I don't mind sparse decor, but I think we need a little bit more.

The bookcase looks good for now, and gives me a lot more storage for albums and my books.  I read about 5 to 6 books at a time and need a place to stack them.  Here it is being painted:
I love the sea foam green!  We are getting rid of the floor lamp, and the lamp on top of the shelf needs to find a home.

I also tried to follow Young House Love's idea to buff scratches out, but it didn't work for my dresser.  For now, it is how it is.

Finally: the to-do list:
  • Paint bedroom walls
  • Install floating shelves and put up decorative items on them
  • Get bench or seating for room
  • Remove wallpaper in bathroom sink area
  • Paint bathroom sink area and bathroom
  • Install curtains and new curtain rod
  • Change ceiling fan or get new light fixture
  • Get new nightstands to match the height of our actual bed
  • Sand and paint bookcase
  • Move in bookcase to hold books and personal items
  • Hang art, some pictures, and other stuff for accessories
  • Clean old dresser and buff out scratches, perhaps get new pulls
Here is my post that explains my inspiration for the room (part 1).

JBF Prep & Sale Tips

Whew!  It takes a lot of work to consign at the JBF sale.  I mainly consign outfits that I got at the last sale and are either looking a little worn (but not so worn the sale won't accept them) or seasonal outfits that won't fit my best friend's daughter (we trade clothes) when she will need them.  I also have a lot of leftover clothes that didn't sell from the last sale, already tagged and ready to go.  All you need is a bit of organization, and some space to spread out!
 You have to tag each item in your online account, assign a category, size, and price.  Then you have to affix the labels to each item, and organize the clothes by size.  When you get to the sale, JBF volunteers WILL check all your items and some checkers are pickier than others.  No stains (however light), no rips, no unwashed clothes, etc.  I put shoes in ziplock bags if they fit to be sure the sale doesn't lose a shoe!  You print out all the tags, then cut & pin or tape the tags to your items.  Clothes take a while because of all the safety pins it takes (see below)!
And then, after the checkers approve your clothes, YOU have to put them on the racks in the appropriate size categories (which is why sorting by size is good!).  It saves a ton of time if you have all the 0-3 months together and can put them all in the same spot.  I use cheap ribbon to bow tie the like sized clothes together by the hanger in order to make this painless.  It worked so well!

Happy JBFing!  And if you're in Tampa, go to the one this weekend!  The sale is free on Saturday at the Florida State Fairgrounds or $2 admission Friday.  And the 50% off sale is on Sunday for all tags without a star.

Strawberry Festival

Plant City, Florida
March 7, 2013


The curtains in the living room aren't the greatest by any stretch.

Before:


So I started with 8 panels of some curtains that I loved online, but are a little bit too shiny.  Anyone know of a way to reduce shine???
 Here they are all sewn together, it is one gigantic panel.  Then I sewed onto the very top of the curtain something called pleaters tape.  Mine is 3 7/8" wide, unfortunately for me, the pleater pins I bought at 3 7/8" went out of stock and I couldn't get them anywhere.  So I had to make do with 3" pins and 3 7/8" tape.

 It has pockets spaced evenly on the tape to insert the pins, which will gather the curtain panel evenly to make a pleat.
 You just slide one prong in at a time (there are four prongs on each pin).
 Two...
 Three:
 Four!
 I skip one pocket in between each pleat pin.  Now, I sewed on the pleat tape, and left about 7/8" hanging off the top, to cut off, so that the tape is approximately 3" wide.  This is how I got around not having the right size pins.
 Snip off the excess tape:
 Here are some pins on the back, with one pocket space between them.
 After:
As you can see, they are so long because it covers up a large sliding glass door.  A feature is that they can slide all the way clear of the door, which is a pocket glass door, and when it is open the curtains don't block the doorway at all.  I just wish they weren't as shiny.  My husband wishes it didn't look like a theater curtain.
What do you think?  Can I keep them?  They don't match the style?  Hate them?  I am not in love with them.  But of course now I've modified 8 panels of curtains from overstock.com and cannot mail them back.  We will keep them for a while.  But then I'll definitely have to switch them out.  Baby steps.  They are still new, clean, and a step up from the original.
The master bathroom is coming together, after a paint color change (bah!).  Don't you hate painting things two times?  I am a quick decider, which sometimes means I don't end up loving what I do.  Which means I have to redo.  Bummer.  But it is so hard to pick everything right the first time.  Try not to beat yourself up if you have the same problem, we all find it hard sometimes.  

I think this house is harder given the fact that we don't have a lot of natural light in rooms.  If the rooms have dim or non-natural light settings, then your color will look differently than in another room, or in the store.  Don't forget to get a paint sample if you can't tell if it will work for you!

Here is what the bathroom looked like when we moved in:


I left off with the walls ready for paint.
And then I painted the Havana Cream color...but it was TOO yellow.

I couldn't keep it.  It brought out the pink in the shower stall and I hate pink.  So I switched to an off white color called Cozy Cottage.  I also took down the wall paper in the outer area of the master bathroom and primed the walls so I could paint that area at the same time as I painted the shower stall for the second time.


 It all came together really nicely and the paint color very closely matches the sink.  The color is Behr's Cozy Cottage.  Can you tell that it is more neutral and without so much YELLOW?  I like it much better.
 I also added a hook hanger for about $12 from Lowe's so that we have a place to hang towels in the shower room.  Previously I was using a plastic hook off the door.  It is truly the little things that help room to be more functional.  My husband didn't even know I put this up, that is how easy it is!
 You can see a little of the master bedroom paint color, although it is much greener in person.  And you can see the shower room with the hanging towels from this view as well.  I just rehung the pictures we already had in the same configuration, because I like them that way.
 Obviously, the lights still need to be replaced, but I'll save up for that and give another post when I do.  I also want to update the mirror.  It is currently just plain and actually too large for a one person sink.   The door on the mirrored wall is to the garage.  I wish I could just drywall that over and add a double sink vanity to replace what is there already.  Maybe later...
 We need to add some drawer locks for the tall less than 2 year old.   Below is the view from the bathroom to the bedroom.  It is coming together!  See the shelf leaning against the wall in front of my dresser?  I still have to install that and add some accessories, and update the outlets.
 And the view from the shower room into the closet area. 

See more about how far the bathroom has come here:  part 1, part 2, part 3

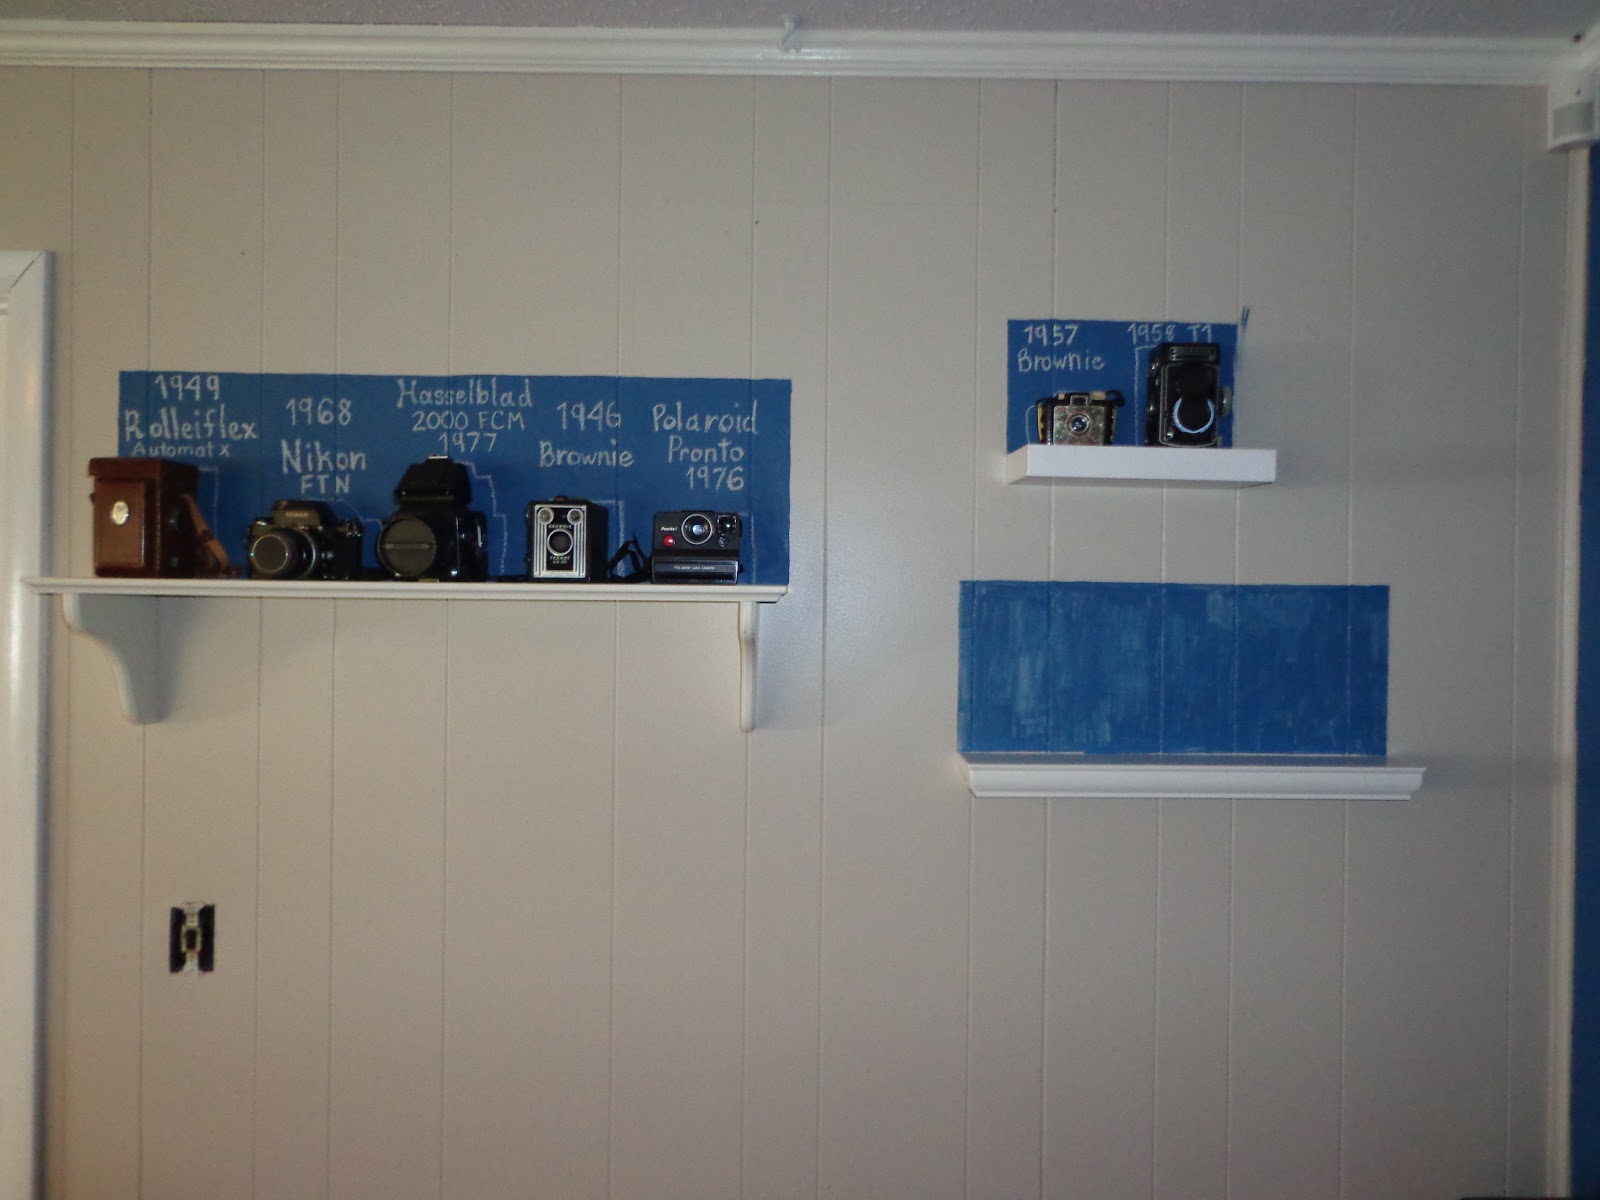
Camera Project Reveal

Ta-da!

The camera project is finally done.  At this point, I could never have believed it would have taken this long, but I do like the final product.  I think this is a great way to display some cameras you don't need or cannot use anymore.


And see the unfinished light switch?  I fixed that, too!


Here's the finished camera project with all 10 cameras.
 Here are the camera names:
  • 1949 Rolleiflex Automat X
  • 1968 Nikon FTN
  • 1976 Hasselblad 2000 FCM
  • 1946 Brownie Travel Six-20
  • 1976 Polaroid Pronto
  • 1957 Brownie Bullet
  • 1958 T1 Rolleiflex
  • 1984 Canon AE-1
  • 1971 Kodak Instamatic 404
  • 1965 Kodak Instamatic X-15
Ah, much better.  The living room is now completely done.  (Except furniture.  It has basically no furniture.)

If you haven't seen the previous project posts, you can see them here:
Part 1
Part 2